Trial Manager is designed to provide management, curation, and visualisation tools for trials. These trials are scored with KDSmart and then curated in KDXplore before uploading to KDDart. This section provides more information on trials, including how to create and manage them in Trial Manager.
Trial is the general term used in KDDart to refer to studies, experiments, nurseries, projects, etc. contain traits used to record data and possibly also tags. You can find more information on traits and tags on the Trait and Tag pages. These traits will always be on the plot-level, and some trials may also contain subplot-level traits.
Generally, a trial is created in KDXplore or KDManage, transferred to KDSmart for scoring in the field, transferred back to KDXplore for data curation, and finally uploaded into KDDart.
Definition: Plots & Subplots
Trials contain multiple plots - areas, spaces or even pots, uniquely identified by a plot ID or by coordinate pairs (Column/row ID), or both. Subplots are individual specimens within a plot.
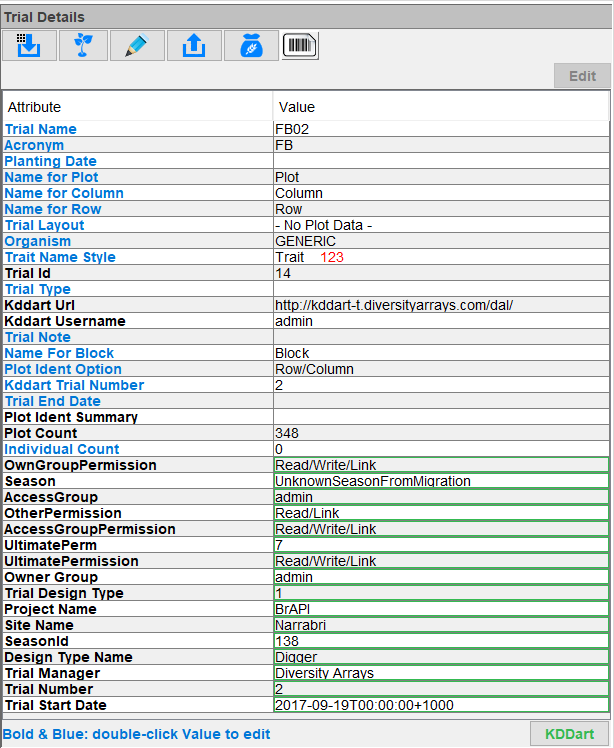
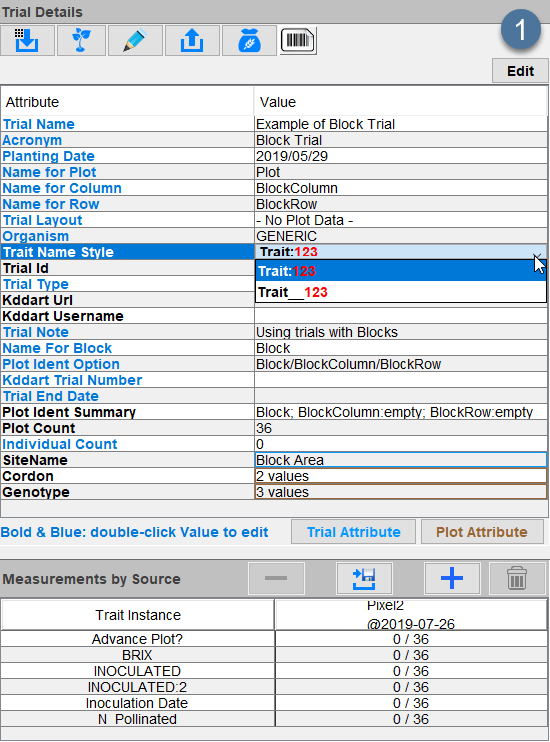
Each trial contains a set of details that define its characteristics. The following table lists the details of a trial (from KDDart) displayed in the Trait Details panel. The details outlined in green in the image below are details related to KDDart.
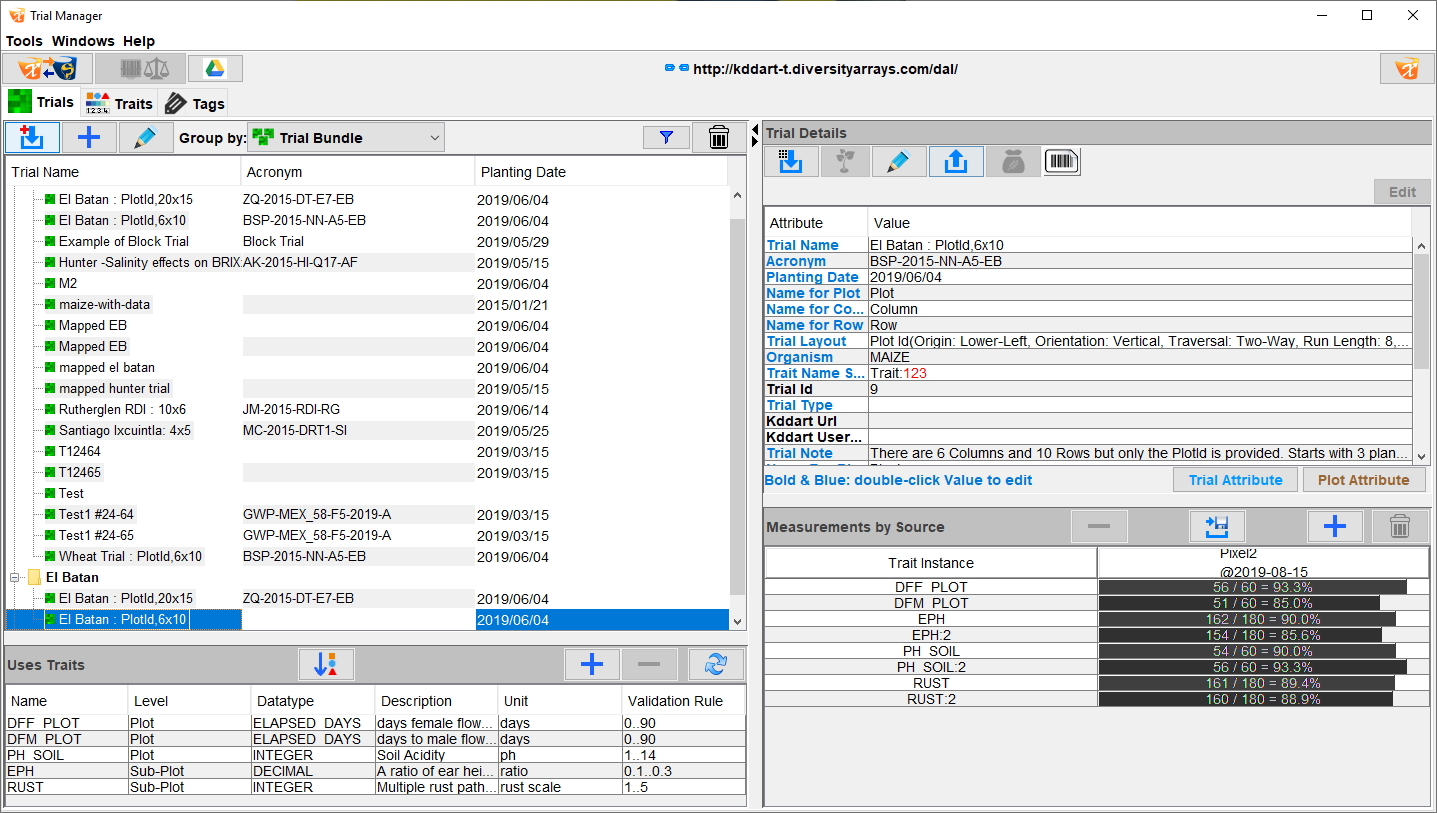
Trials in Trial Manager are managed from the Trials tab, outlined on the Trial Manager Overview page. You can perform the following actions in the Trials tab.
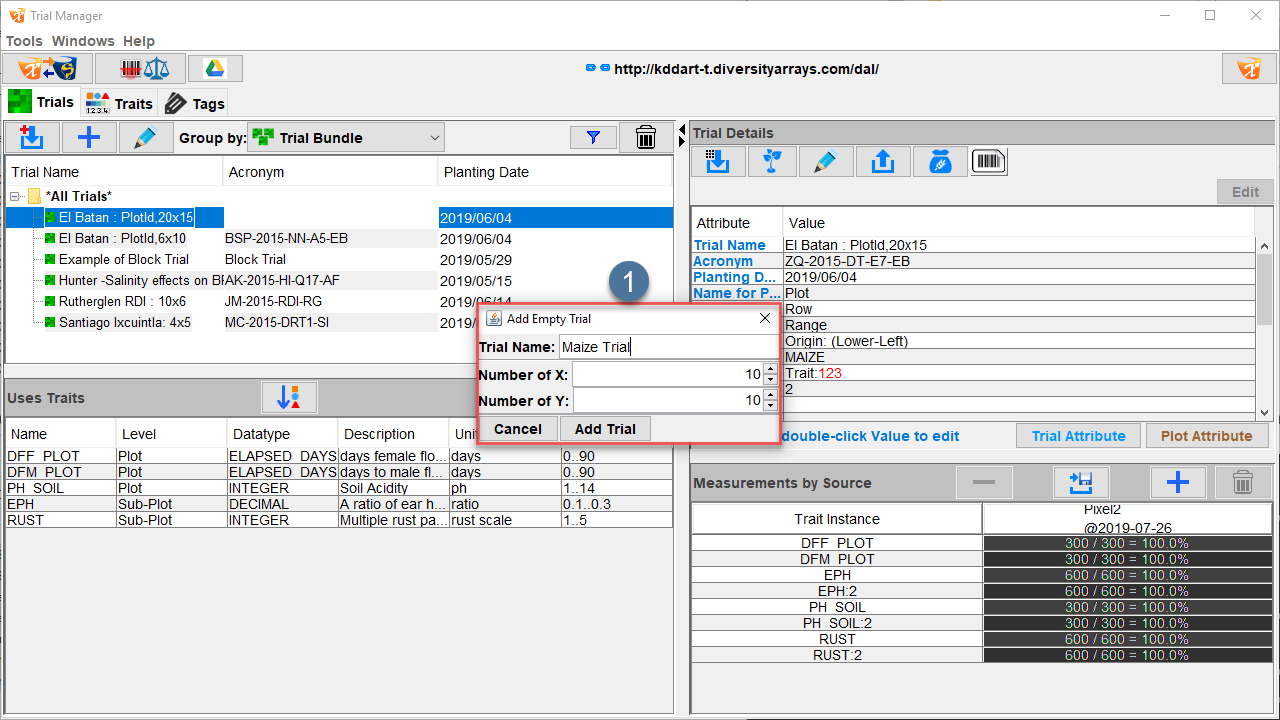
Empty trials need to have traits added to them for scoring. Please note that this same method works when you need to add traits to existing trials. The example below is the addition of traits to the empty Maize Trial created in the section above.
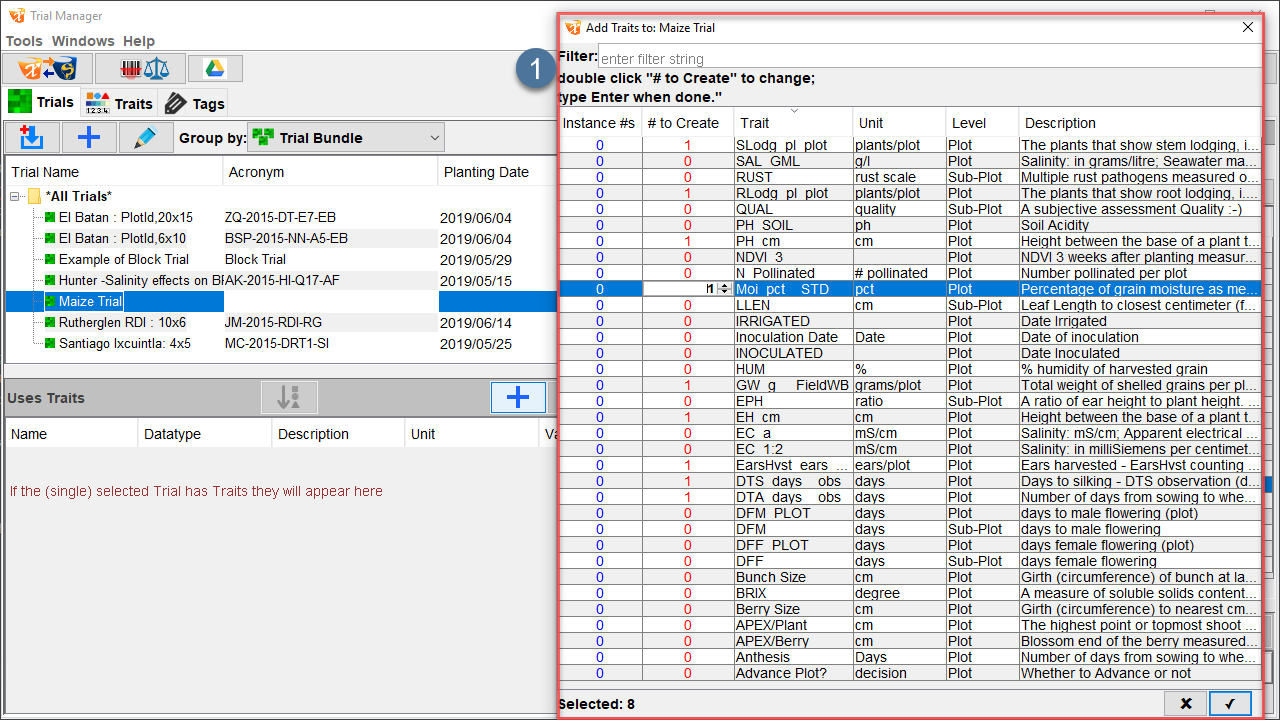
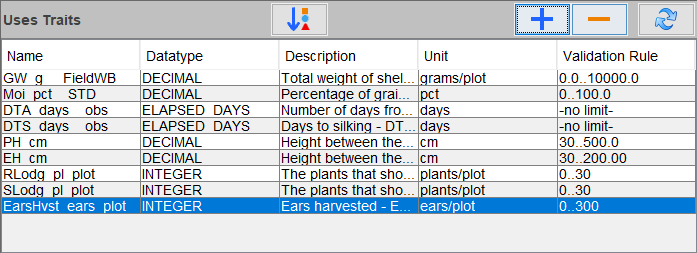
Select a trial from the Trials panel to add traits to. The Maize Trial from the image above has no traits, so the Uses Traits panel is empty.
2.
Select the Add Traits button from the Used Traits panel. This will open the Add Traits window (as seen at ).
3.
The Add Traits window contains all traits that are available in Trial Manager. The Instances column shows how many instances of that trait are in the trial. Select one of the column headings such as Unit to reorder the traits list.
4.
Double-click any cell in the Create column to edit the number of instances of the corresponding trait (such as the Moi pct STD trait in the example above).
5.
Once you have added traits, select the Confirm button to finalise the addition of the traits to the trial. They will now appear in the Uses Traits panel and the Measurement By Source panel.
Select a trial in the Trials panel to be edited. This will display its attributes in the Trial Details panel.
2.
All of the attributes in blue font are editable. Select one of the attributes and then select the Edit button (at ).
3.
Depending on the attribute’s data type, the Edit button will allow editing the value with a dropdown menu (such as the example in the image), calendar, or text field. For a text field, press the enter key to confirm the changes.
You can also delete trials from Trial Manager. However, any deleted trial is only deleted from the local database and not from any connected KDDart databases. Additionally, any deleted trial will not be available in other KDXplore plugins.
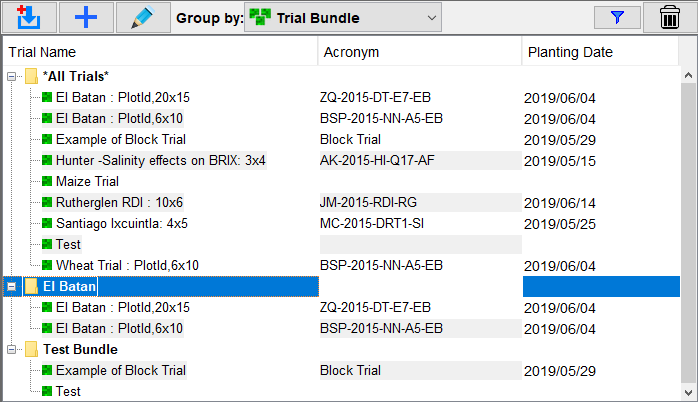
Trials can be grouped into bundles to help with management. Trial bundles can be created in Trial Manager and imported/exported from other devices as well. A bundle called All Trials is always automatically created by KDXplore.
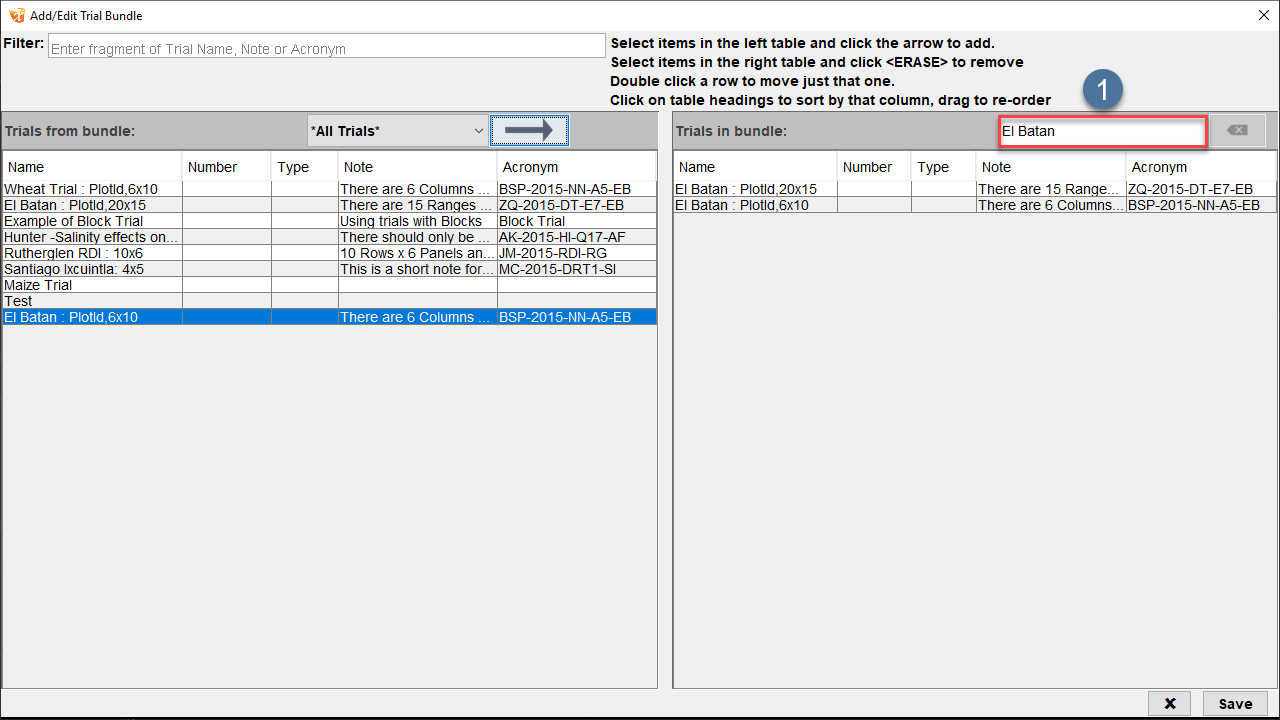
Select the Add button from the Trials panel and choose the Add Trial Bundle option to open the Add/Edit Trial Bundle window as pictured above.
2.
To add a trial to the new bundle, either double-click a trial or select it with a single-click, then select the Add To Bundle button. Click+drag, shift+click, or ctrl+click to select multiple trials.
3.
Enter a name for the bundle in the field at .
4.
Ensure you have added all the required trials, and then select the Save button.
From the Trials panel, select a trial bundle to be edited and then select the Edit Button. This will open the Add/Edit Trial Bundle window.
2.
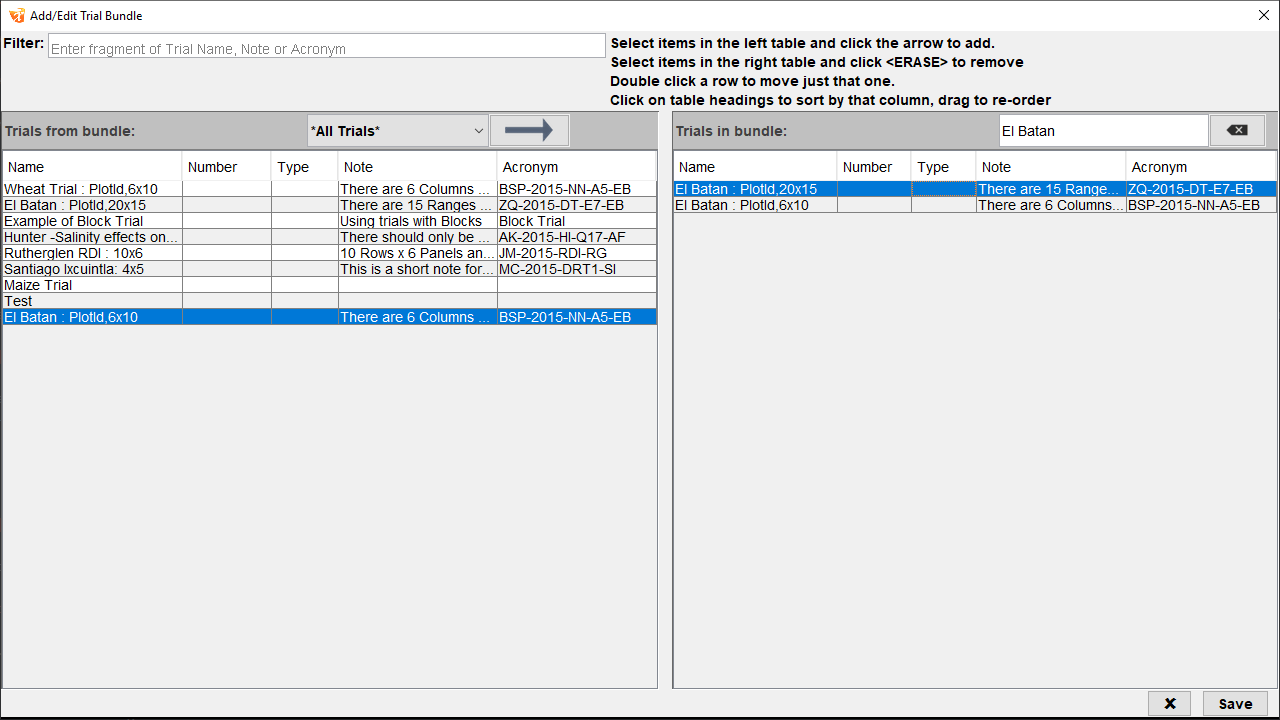
To remove trials from a bundle, select one or more trials from the bundle (listed in the Trials In Bundle panel) to be deleted and select the Remove button to confirm the edit.
3.
You can also add more trials to the bundle. To add trials, select one or more trials from the Trials From Bundle panel and then the Add To Bundle button to confirm the edit.
From the Trials panel, select a trial bundle to be deleted and select the Delete button (as in the above image).
2.
Select the Delete Trial Bundles option.
3.
There will be a confirmation dialogue that will ask for confirmation to delete the selected trial/s. Select the Yes button to confirm the deletion or the No button to cancel the deletion of the bundle.