Overview
Sample Manager is a KDXplore plugin that enables users to assign collected samples with barcodes to plate wells. You can then upload these samples to the DArT Online Ordering system for sample submissions. See the Workflow page if you want more information on how to use the plugin.
Note
Sample Manager is still under development. If you experience any issues or have feedback, please get in touch with us at kdxplore@diversityarrays.com
Sample Data File Format
Sample data files must be a CSV file in a specific format so that Sample Manager can recognise them. If you do not already have a sample data file, follow the links below to download an example file (with example data) or a template file:
Sample Data File - Example: Download
Sample Data File - Template Download
See the table below for more information about the mandatory columns that must be present in a sample data file for Sample Manager to recognise the file:
Column Name |
Description |
|---|---|
Barcode |
Any barcode associated with the sample. |
Genotype |
Genotype of the sample. |
Organism |
Organism type of the sample, e.g. wheat. |
Tissue |
Tissue collected from the sample, e.g. leaf. |
Comments |
Any comment related to the sample. |
Note
The example file above contains many non-mandatory columns that provide an example of the data collected in actual use.
Main Window
The Sample Manager Main window displays all plates as well as their assigned contents. There are also tools for the management of plates, samples, and associated files. See the image and table below for more information:
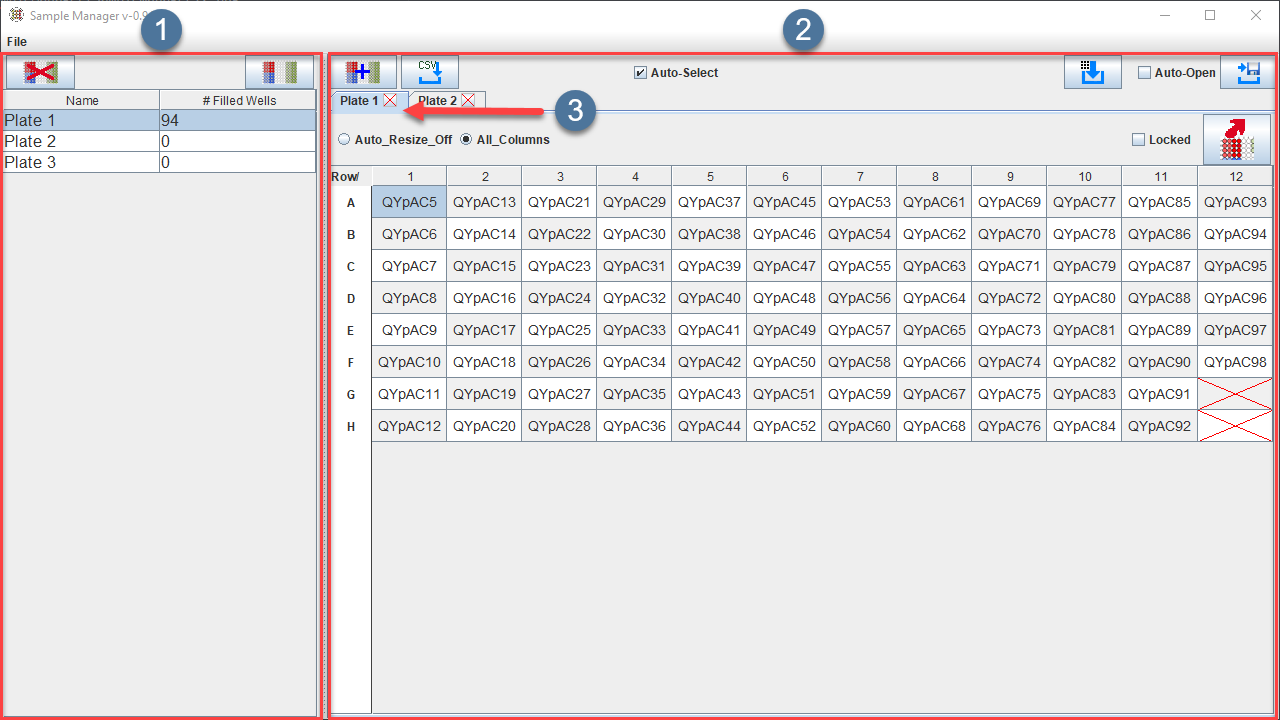
UI Element |
Description |
|---|---|
|
Lists all plates created within Sample Manager. There are also options for viewing or deleting these plates. |
|
Contains one or more Plate tab/s and options for managing these plates, such as importing sample data and unassigning samples from wells. |
|
Displays each opened plate as a tab with a 96 well plate. |
|
Deletes any plate from the local machine. |
|
Opens the selected plate as Plate tab within the Plates panel. |
|
Displays options for the creation of a new plate. |
|
Displays the Import Sample Data window for importing sample data and assigning samples to well. |
|
Saves any changes made to any of the plates in the Plates list. |
|
Displays export options for any plates opened in the Plates list (so that you can use them in Online Ordering). |
|
Unassigns a sample from the selected well. |
Auto-Select checkbox |
Automatically selects the next well after assigning content to another. |
Auto-Open checkbox |
Automatically opens any exported file for viewing. |
Resizing Radio buttons |
These radio buttons allow the user to choose Auto_Resize_Off, which turns automatic resizing of columns off, or All_Columns, which automatically resizes all columns. |
Locked checkbox |
This can be checked or unchecked to allow/prevent editing of the selected plate. |


Import Sample Data Window
The Import Sample Data window enables the user to add imported data to a newly created plate within Sample Manager. You can access it by selecting the  Import button in the Plates panel. The following image and table outline the main elements of the window:
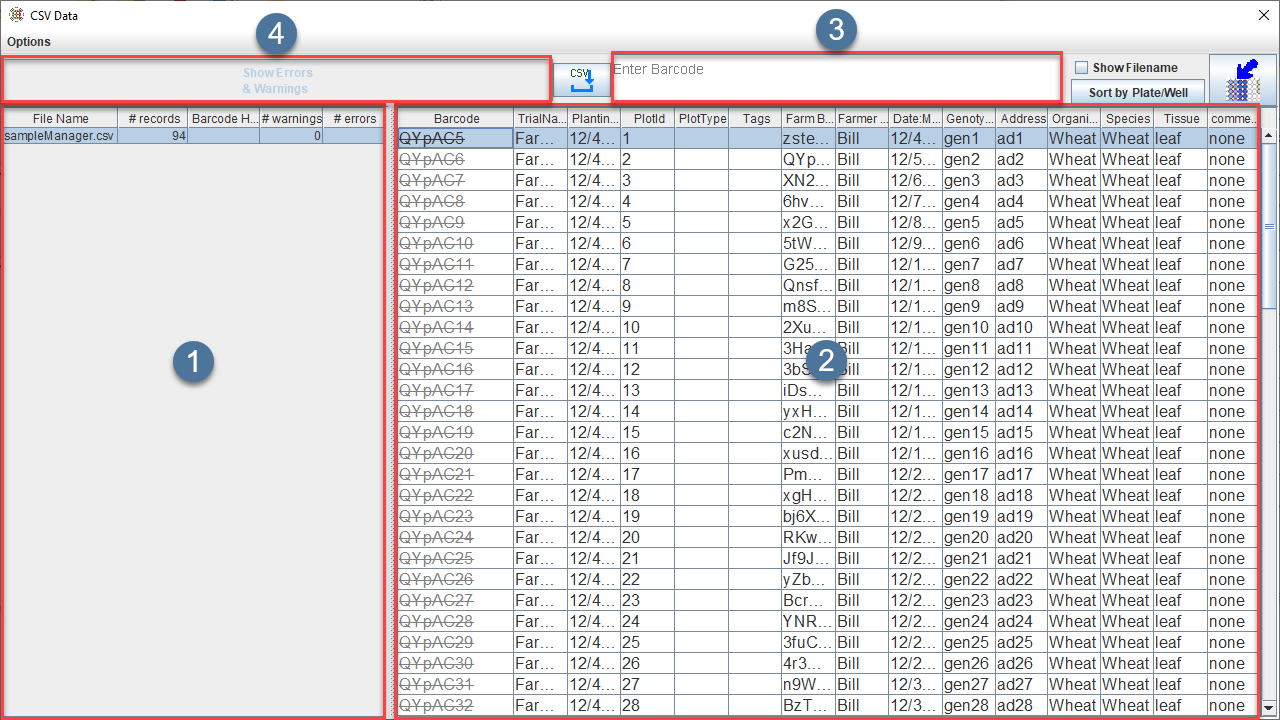
UI Element |
Description |
|---|---|
|
Displays imported sample data files. These files are displayed in the Data panel when selected. |
|
The sample data of any file selected in the Files panel will be displayed here. Each line can be assigned to a well that is also currently selected in the Plates panel of the Main window. |
|
Allows for the entering of a barcode that is associated with a collected sample. |
|
Displays any errors or warnings when importing samples or assigning them to wells. |
|
Opens a window for selecting samples files stored on the local machine. |
|
Assigns samples from the Data panel to wells in the Plates panel. |
Show Filename checkbox |
Displays/hides a file name column in the Data panel. |
Sort by Plate/Well button |
Sorts the listed samples by plateID or by well. |

