Workflow
Sample Manager allows users to manage files for submission, but this is just one part of a potential online ordering process. This process might look something like this:
Collecting samples with KDSmart. This will produce a CSV sample data file that you can use in Sample Manager;
Creating a new plate in Sample Manager;
Importing a sample data file created in KDSmart;
Assigning samples to wells, along with any barcodes; and then
Exporting a samples file for use in DArT Online Ordering.
Importing the samples file into the DArT Online Ordering system.
Note
Steps 1 and 6 do not occur in the Sample Manager plugin. Please follow the respective links for more information.
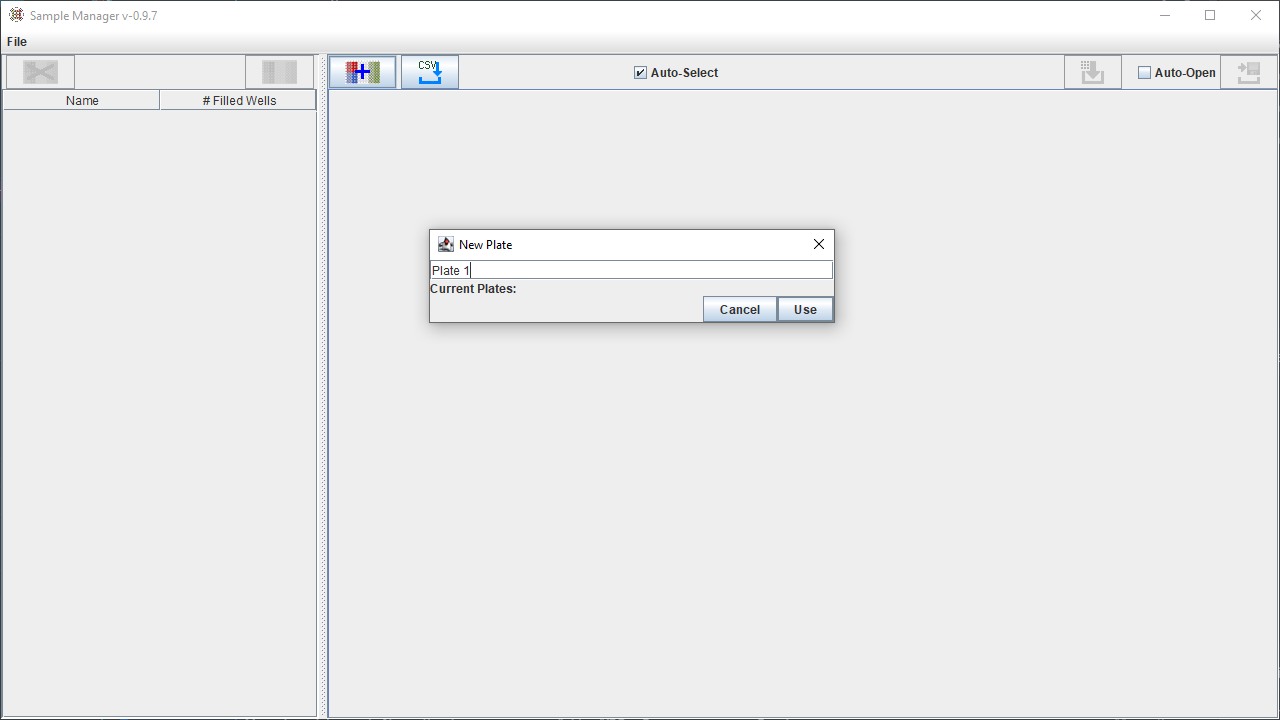
Creating a New Plate
Before importing data into Sample Manager, there will need to be at least one plate created so that samples can be assigned to plate wells. Plates refer to the 96 well plates used when providing samples to DArT and the corresponding entity within Sample Manager.
Step |
Action |
|---|---|
1. |
Select the Create New Plate button |
2. |
Enter a name for the new plate within the text field. |
3. |
Select the Use button, which confirms the name and creates the new plate. The new plate will now be listed in the Plates List panel. |

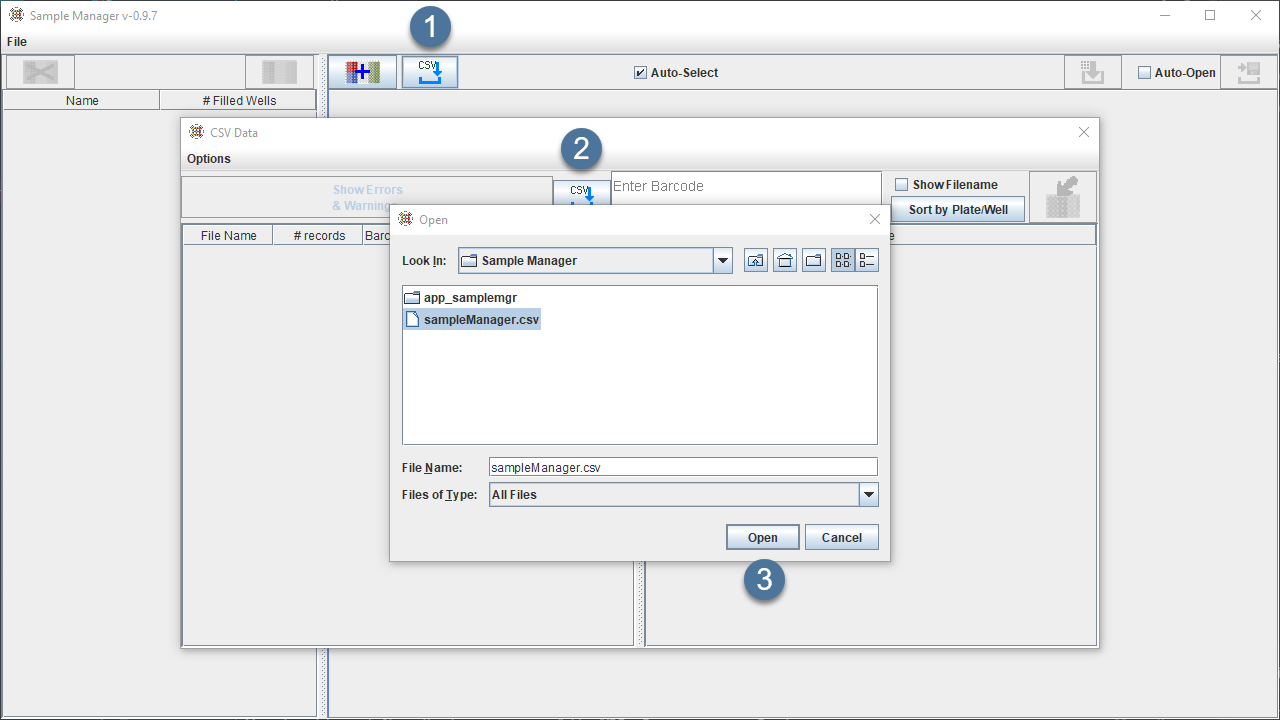
Importing a Sample Data File
Samples data files contain information about samples that have been taken (possibly with KDSmart) and are in the CSV format. Once imported, these samples can be assigned to plate wells with Sample Manager. The instructions below provide information on how to import a sample data file:
Note
Before importing sample data, ensure that there are enough plates created to contain all of that data. 94 wells from each 96 well plate can contain samples. We operate on a 94 sample per plate basis. The file cannot contain information for wells G12 and H12.
Step |
Action |
|---|---|
1. |
Select the Import button from the Main window (at |
2. |
The Files panel will display any previously imported samples files. If no sample data files are available, select the Import button at |
3. |
Choose a file and select the Open button at |


Note
After sample data is imported, it still needs to be assigned to wells. See the next section for more information on how to do this.
Assigning Samples
Samples imported to Sample Manager are assignable to wells of any plate. See the below instructions for more information on how to assign samples to wells:
Step |
Action |
|---|---|
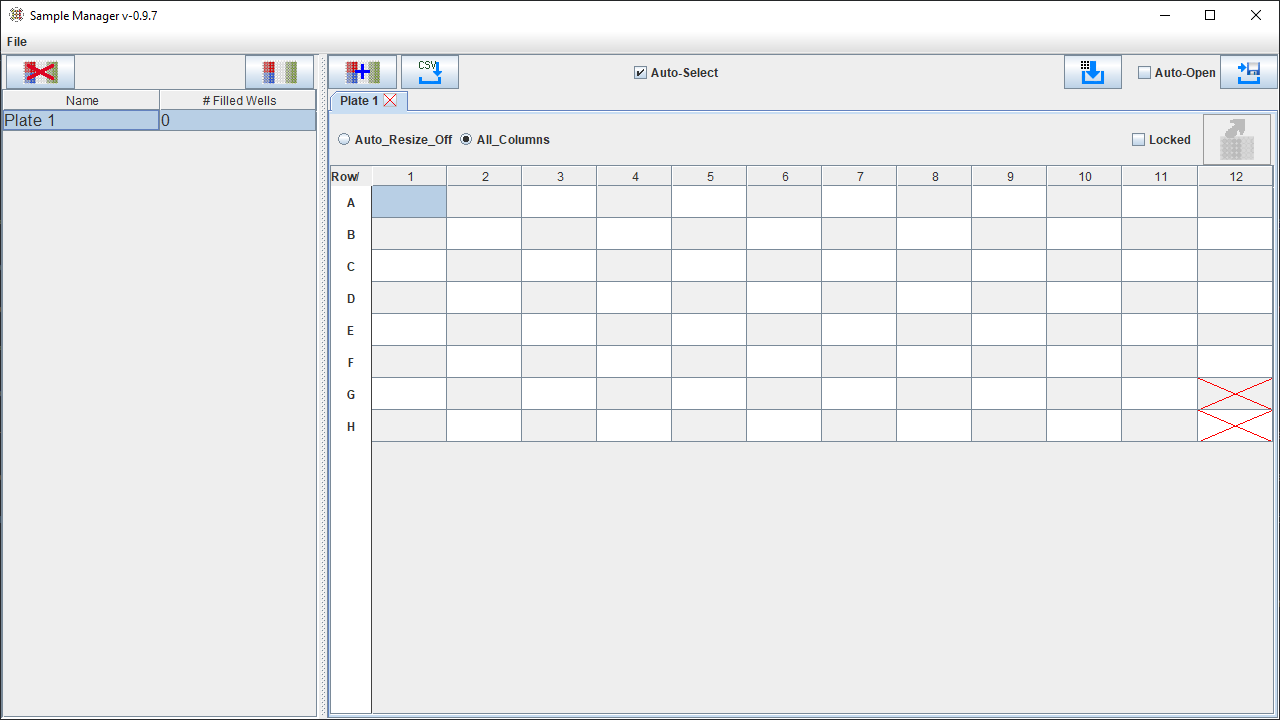
1. |
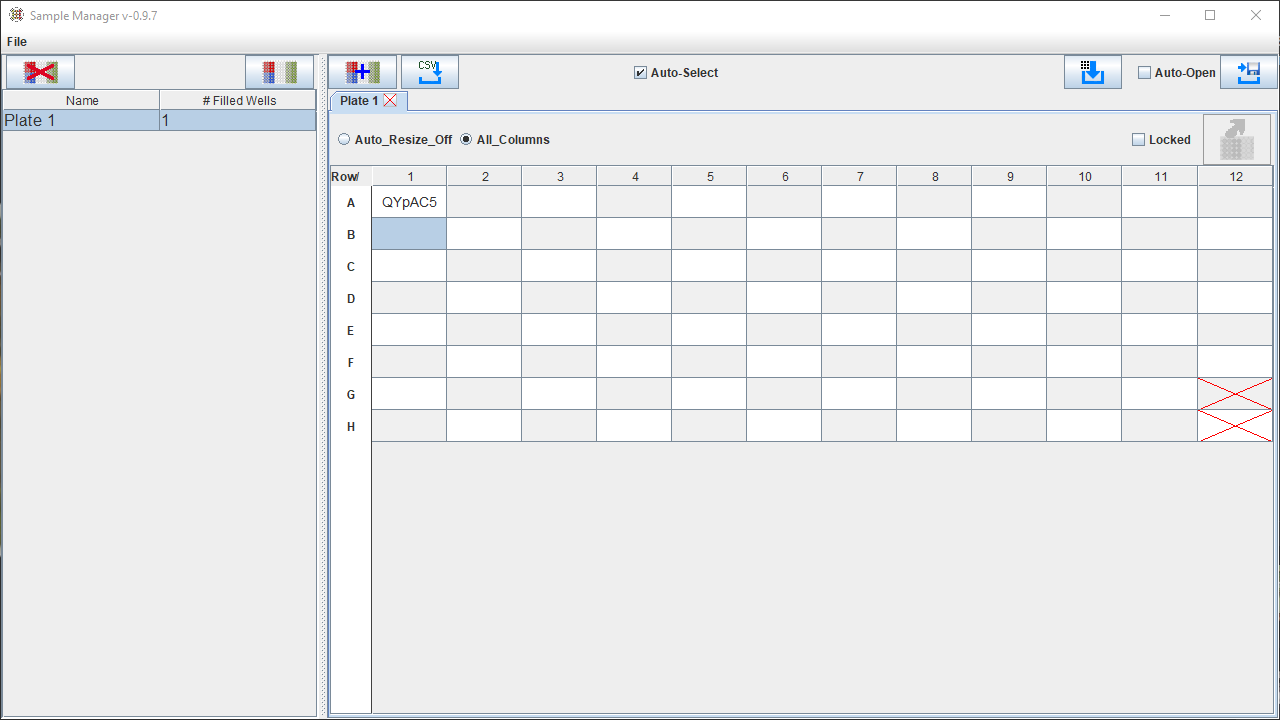
From the Main window, navigate to the Plates list and open a plate by either double-clicking the plate in the list or selecting it and then selecting the View Plate button. This will ensure that the empty plate is available as a Plate tab, as seen in the image above. |
2. |
Ensure that the first well you want to assign sample data to is selected. In the above image, well A1 (the first well) is selected. |
3. |
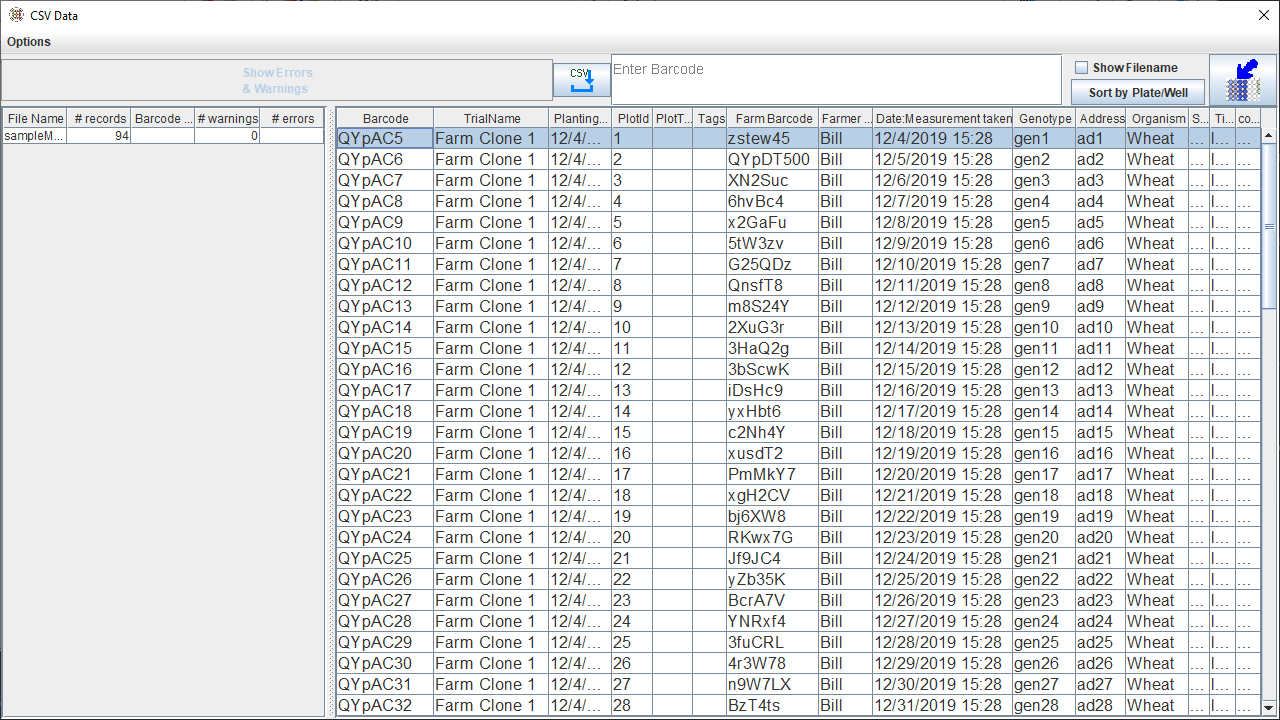
Select the Import button to display the Import Sample Data window (as seen in the image below). If you have not yet imported a sample data file, then see the Importing a Sample Data File section above for more information. |
Step |
Action |
|---|---|
4. |
Select a row from the Data panel. Each row represents one sample. |
5. |
If you have a barcode to assign to the sample, it can be entered in the Barcodes panel. |
6. |
Select the Assign button to assign the sample selected in the Import Sample Data window to the well selected in the Plate tab located in the Main window. This is updated live, and any sample assigned to a well can immediately be seen in the Plate tab. |
7. |
If the Auto-Select checkbox is selected in the Main window, then each time a sample is assigned to a well, Sample Manager automatically selects the next well to assign data to. However, if the option is not selected, you must navigate to the Main window and select the next well after assigning a sample to a well. |
Assigning Samples 3/3¶ Step
Action
8.
Continue assigning all required samples to wells. If there are more samples than wells, you can create new plates. Each time a sample is assigned to a well, it will be disabled in the Import Sample Data window. This is so that the same sample can not be assigned twice.
9.
In the Main window, select the Save button to save the plate/s that have been assigned samples. Saving is not required for exporting, but it will ensure that you don’t lose any work.
Note
See the Sample File Guidelines page for more information about sample files and how to assign them in the correct order.
Exporting a Samples File
After you have assigned sample data to wells, it is ready to be included in an order in DArT’s Online Ordering system. You can do this by creating a samples file from plates with assigned samples. The instructions below demonstrate how to create a sample file from the assigned sample data:
Step |
Action |
|---|---|
1. |
When you have assigned all samples to plates, ensure that required plates are open and all changes are saved by selecting the Save button (at |
2. |
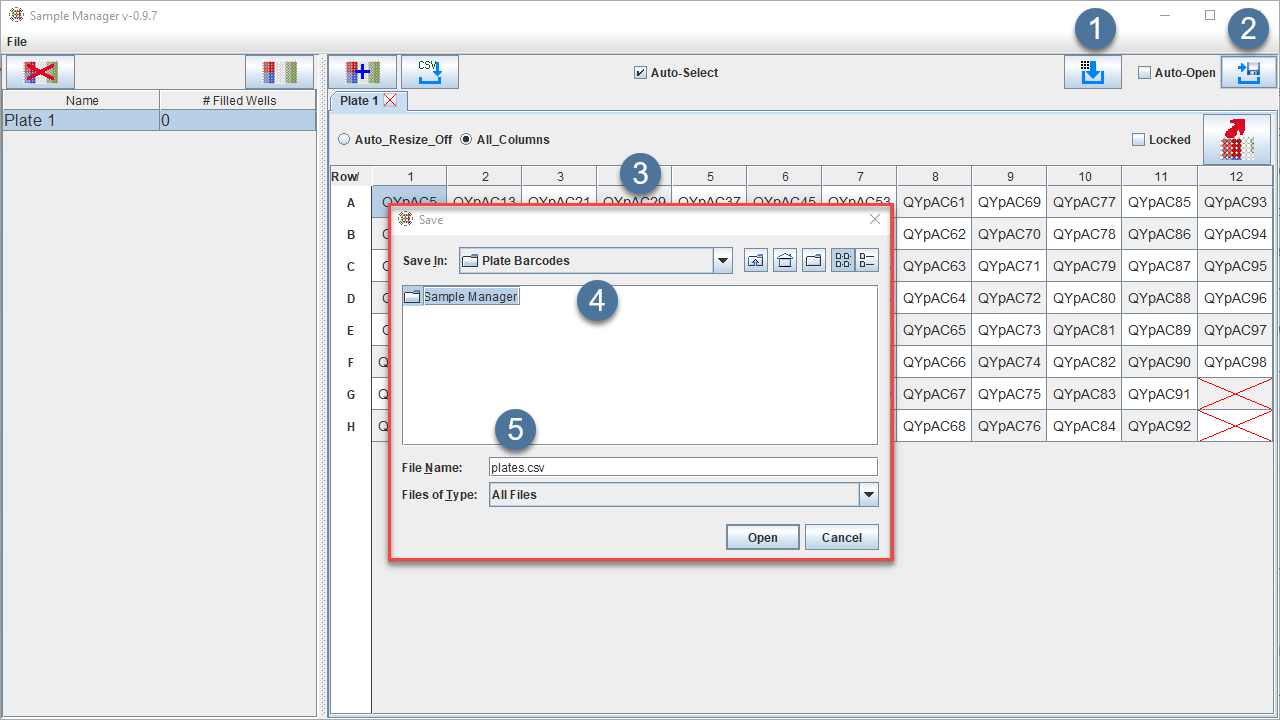
Select the Export button (at |
3. |
Choose a location from the dropdown menu at |
4. |
Name the file in the text field at |
5. |
Select the Open button to complete the export. This will save the file and open it with your default spreadsheet application at the same time. |


Note
Exporting a samples file is the last step in the potential workflow (as described in the Workflow section) that you can complete in Sample Manager. The final step involves using the samples file in an order created with Online Ordering.
Deleting a Plate
Plates can be deleted from Sample Manager when they are no longer needed. If you delete a plate, the plate and its samples are only deleted from the local machine, not from KDSmart or Online Ordering. The instructions below demonstrate how to delete plates:
Step |
Action |
|---|---|
1. |
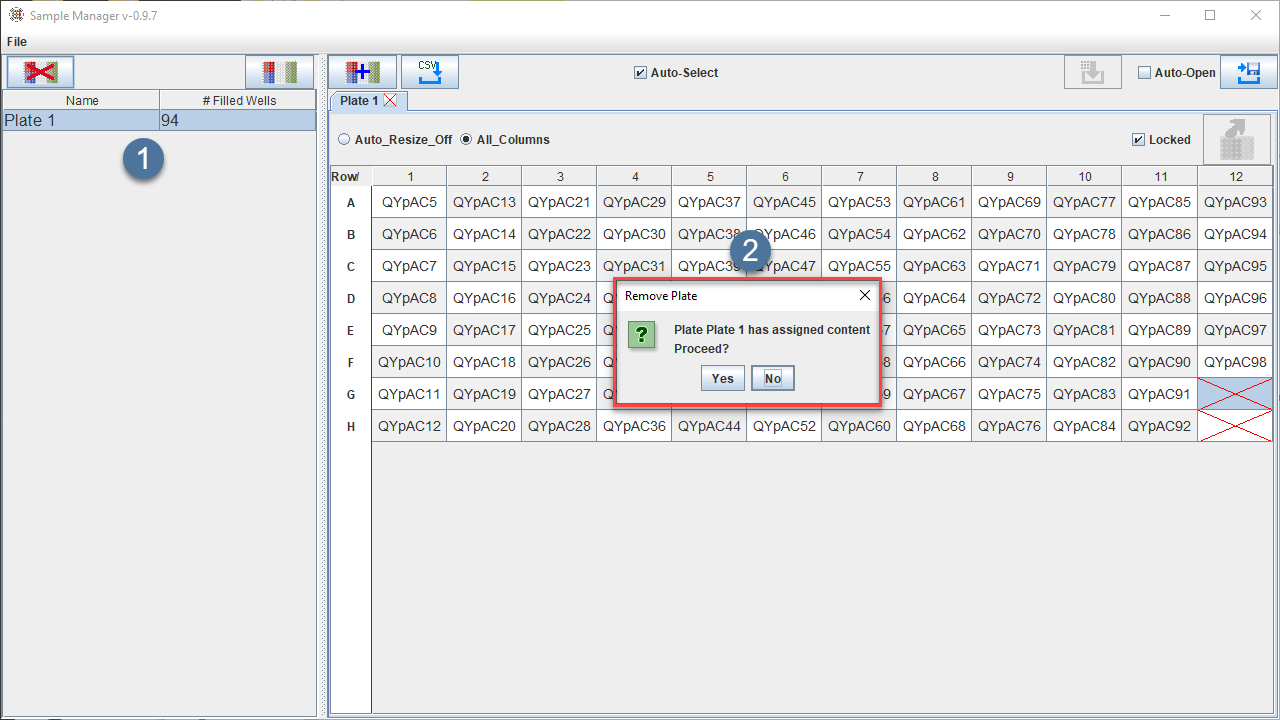
Select a plate to delete from the Plates List panel at |
2. |
Select the Delete Plate button |
3. |
Select the Yes button to confirm the deletion of the plate. |

Note
Any plate that does not contain assigned content will be deleted immediately without a warning message.