Tags
KDSmart scoring includes the use of tags for plots and sub-plots. This section provides more information on tags including how to create and use them.
What is a Tag?
Tags are short, text descriptions that are used to represent information about a plot or sub-plot (a cell) in a trial e.g. ‘BD’ which can mean ‘bird damage’. They provide a quick method of applying predefined classifications or annotations to plots or sub-plots. They essentially work like reusable notes. such as.
Tags have the following characteristics:
User definable;
Consist of a short name and optional long description;
New tags can be created in the field;
Can be imported from a CSV file; and
Are exportable to CSV file.
The main benefits of tags are that they:
Are simple to use - selectable from a list makes them quick and easy to assign;
User or project definable;
Provide consistent annotation, avoiding problems with spelling or language; and
Deployable across multiple users, devices and locations.
This means that the:
Users spend less time writing and repeating notes in the field; and
Data curators have more consistent, uniform recordings from multiple locations by different field workers.
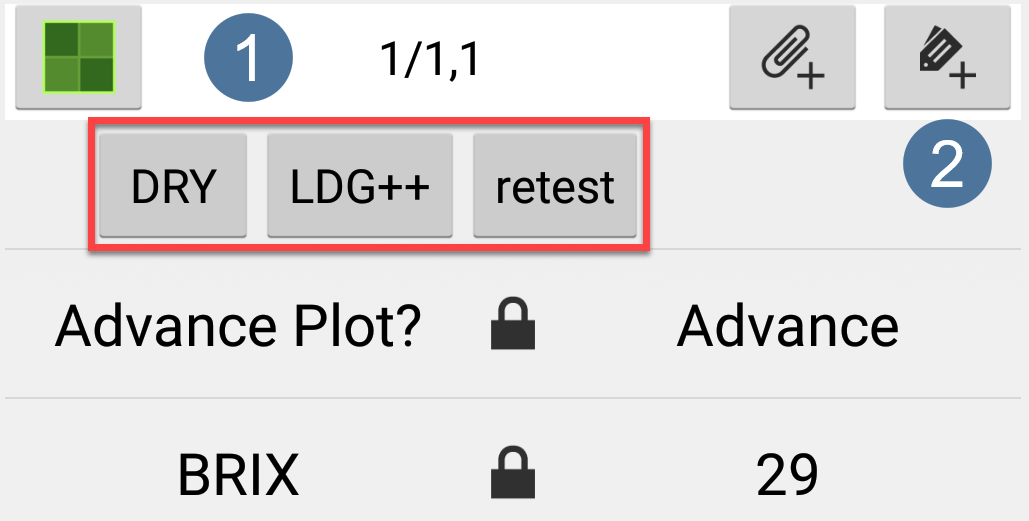
When tags have been assigned to a plot or sub-plot they will appear as shown in the following image, which shows part of the Scoring Screen with two tags assigned at  which is above the trait column.
Tags are assigned or reassigned using the
which is above the trait column.
Tags are assigned or reassigned using the  Assign Tag Button at
  .
.
A few tag examples are shown in the following table:
Tag (Short Name) |
Long Description |
|---|---|
BD |
Bird Damage |
LDG+ |
General Lodging in plots-mild |
LDG++ |
General Lodging in plots-moderate |
WET |
Waterlogging |
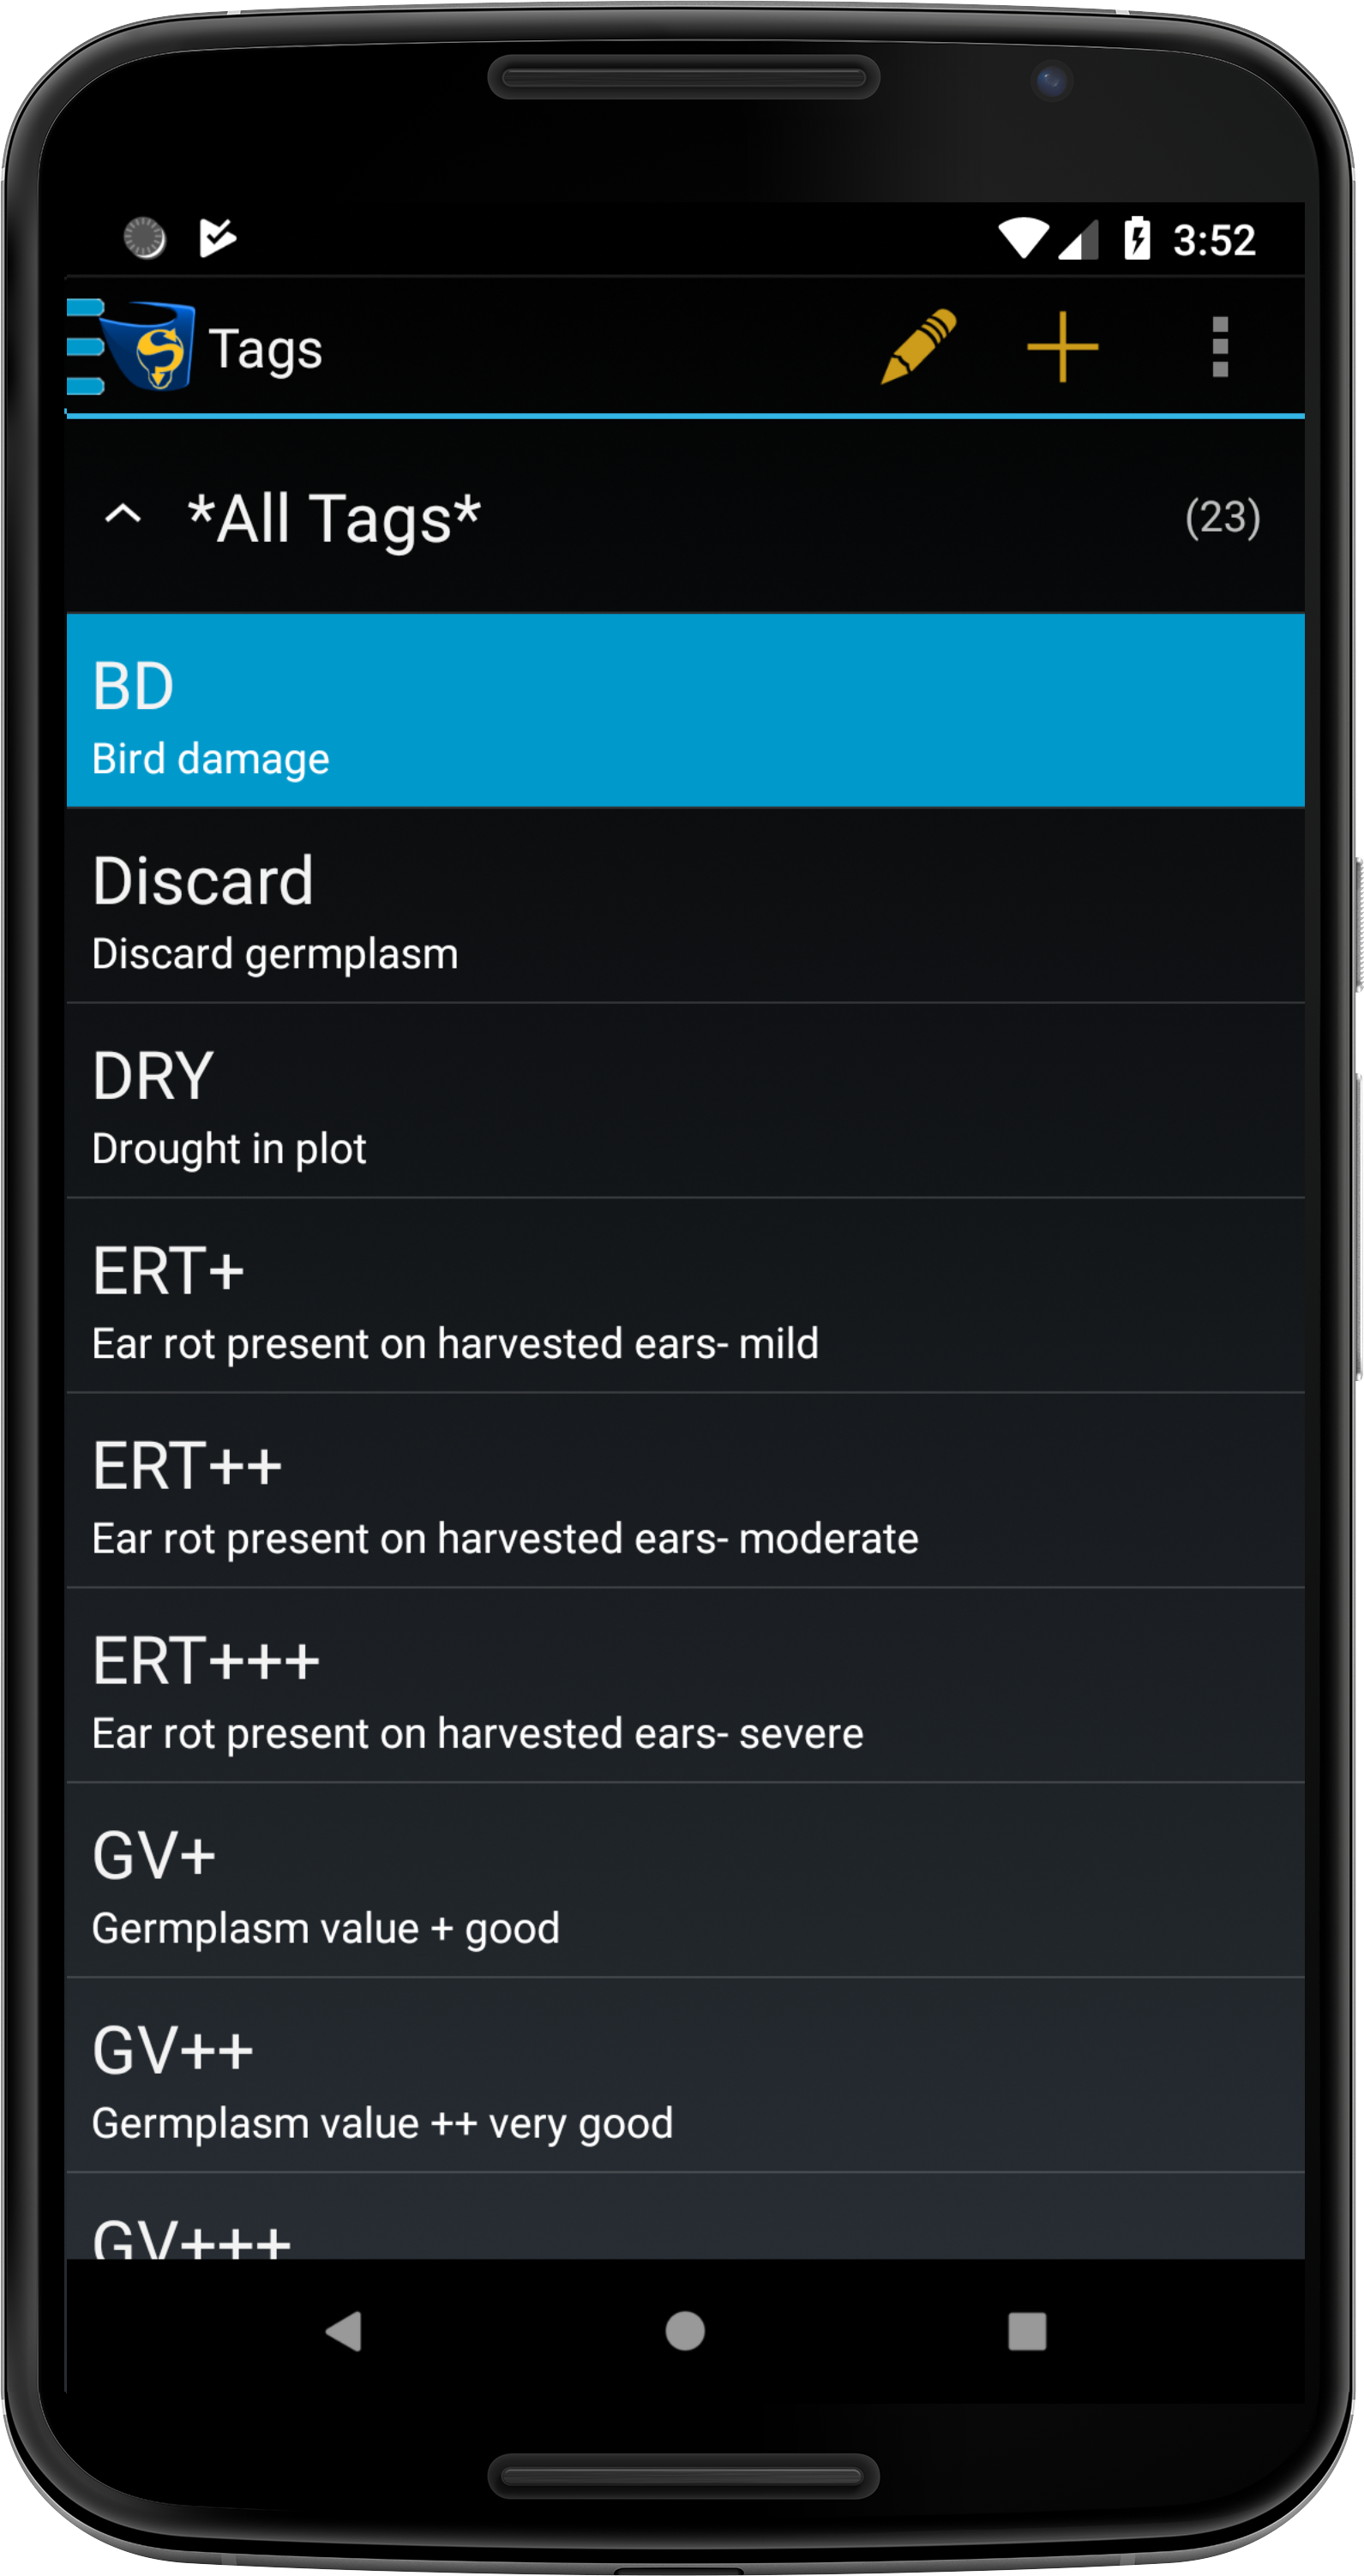
Tag Management
Tags are managed from the Tags Screen which can be accessed by selecting the  Tags Button on the Home Screen or through the Menu. The following actions can be performed at the Tags Screen:
Add a new tag;
Edit a tag description;
Delete selected tag(s) (Note: Assigned/in use Tags cannot be deleted);
Import tags from a CSV file; and
Export selected tags to a CSV file.
Adding Tags
Tags can either be created in KDSmart or imported. Follow the instructions below to create a new tag.
Step |
Action |
|---|---|
1. |
Open the Tags Screen and select the |
2. |
Enter a Label (tag name) such as ‘HD’ in the image below. Select the Use option to check if the name for the tag is free and confirm it. 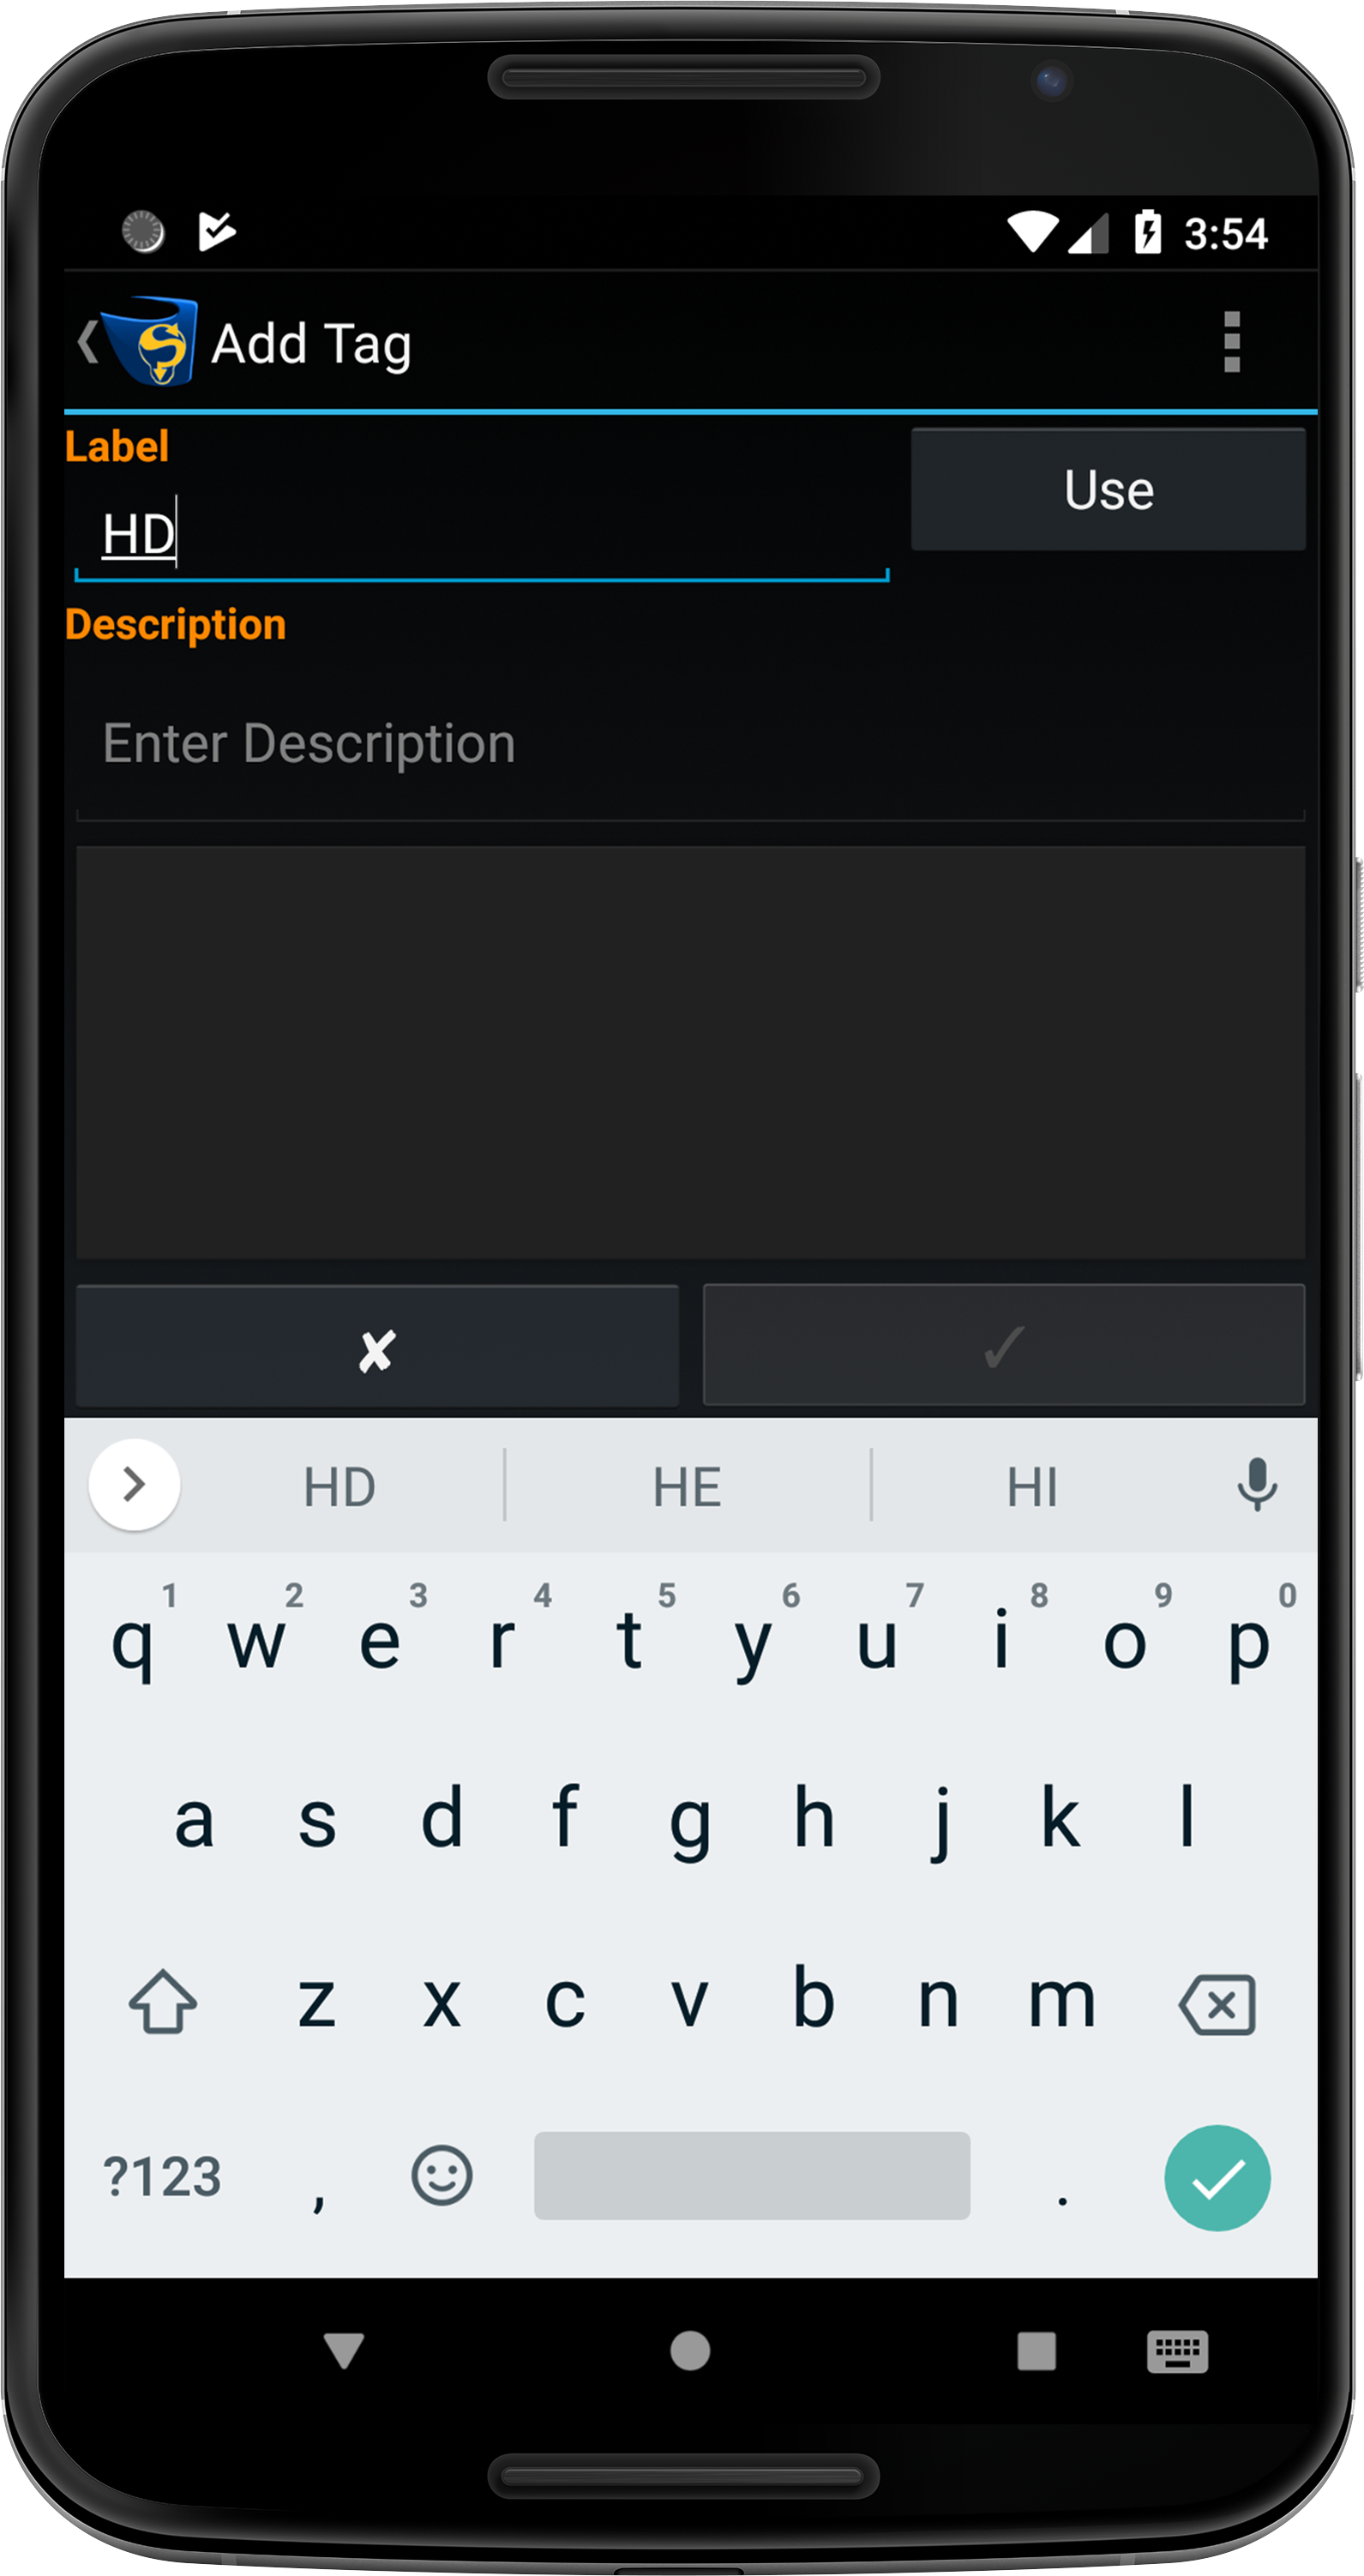
|
3. |
A description can be added once the tag name has been confirmed. Enter the description into the text field and then select the Confirm Button (the tick) to confirm the name and description of the tag. 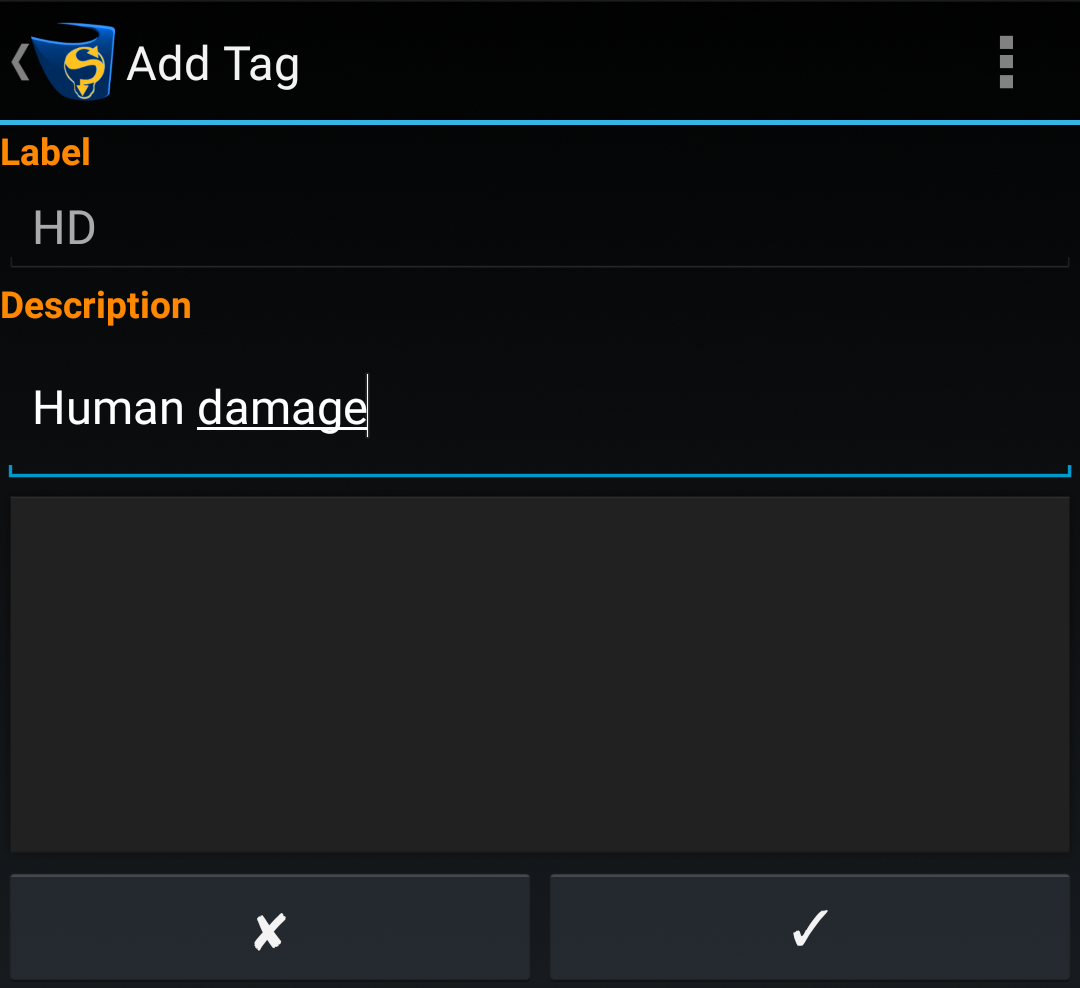
|
4. |
A dialogue box will open and you will need to choose to cancel, edit, or confirm your new tag details.
|

Editing Tags
Tags can be edited once they have been created. The instructions below outline how to edit a tag.
Step |
Action |
|---|---|
1. |
Open the Tags Screen and select a tag that you would like to edit. |
2. |
Select the 
|
3. |
Edit the tag name and/or tag description and select the Confirm Button. 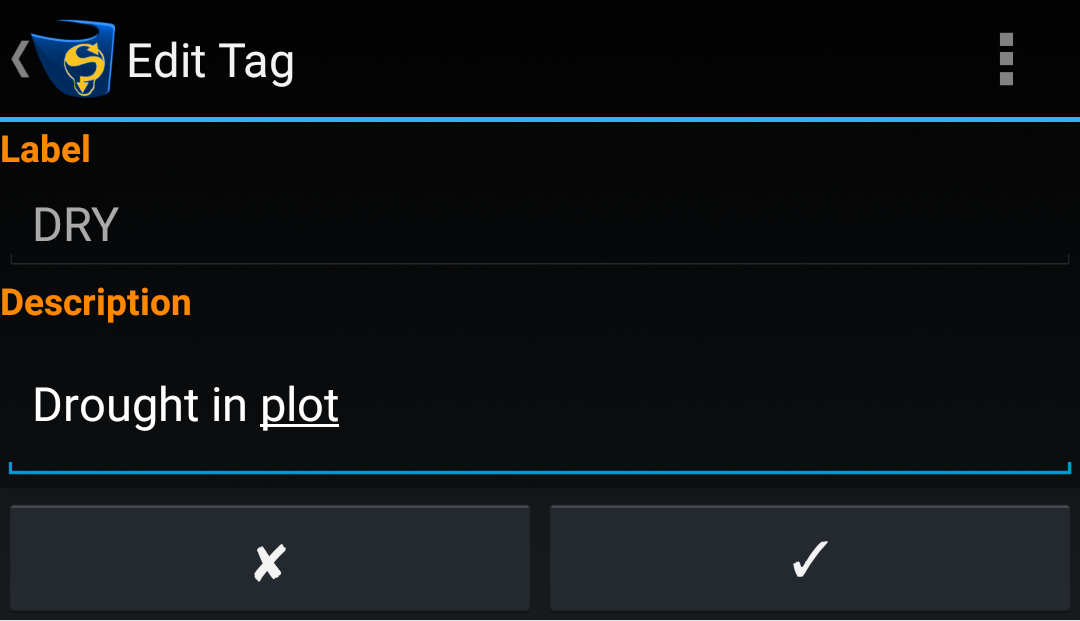
|
4. |
A dialogue box will open and you will need to choose to cancel, edit, or confirm the edited tag details. 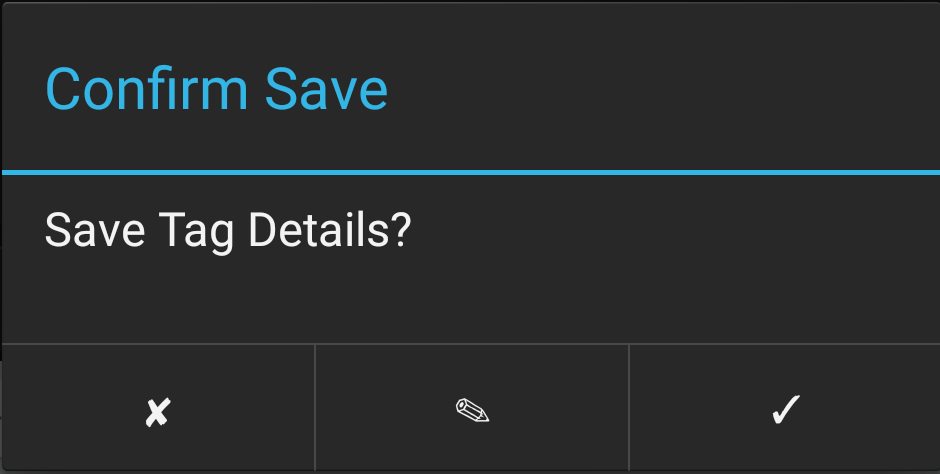
|

Deleting Tags
Tags can be deleted by either multi-selecting tags and deleting them or just deleting a single tag. Once a tag is deleted it is not possible to undo the action so it is best to keep tags in a CSV file.
Step |
Action |
|---|---|
1. |
Select the tags that you want to delete by long-pressing it. Short-pressing any additional tags will allow you to multi-select multiple tags for deletion. 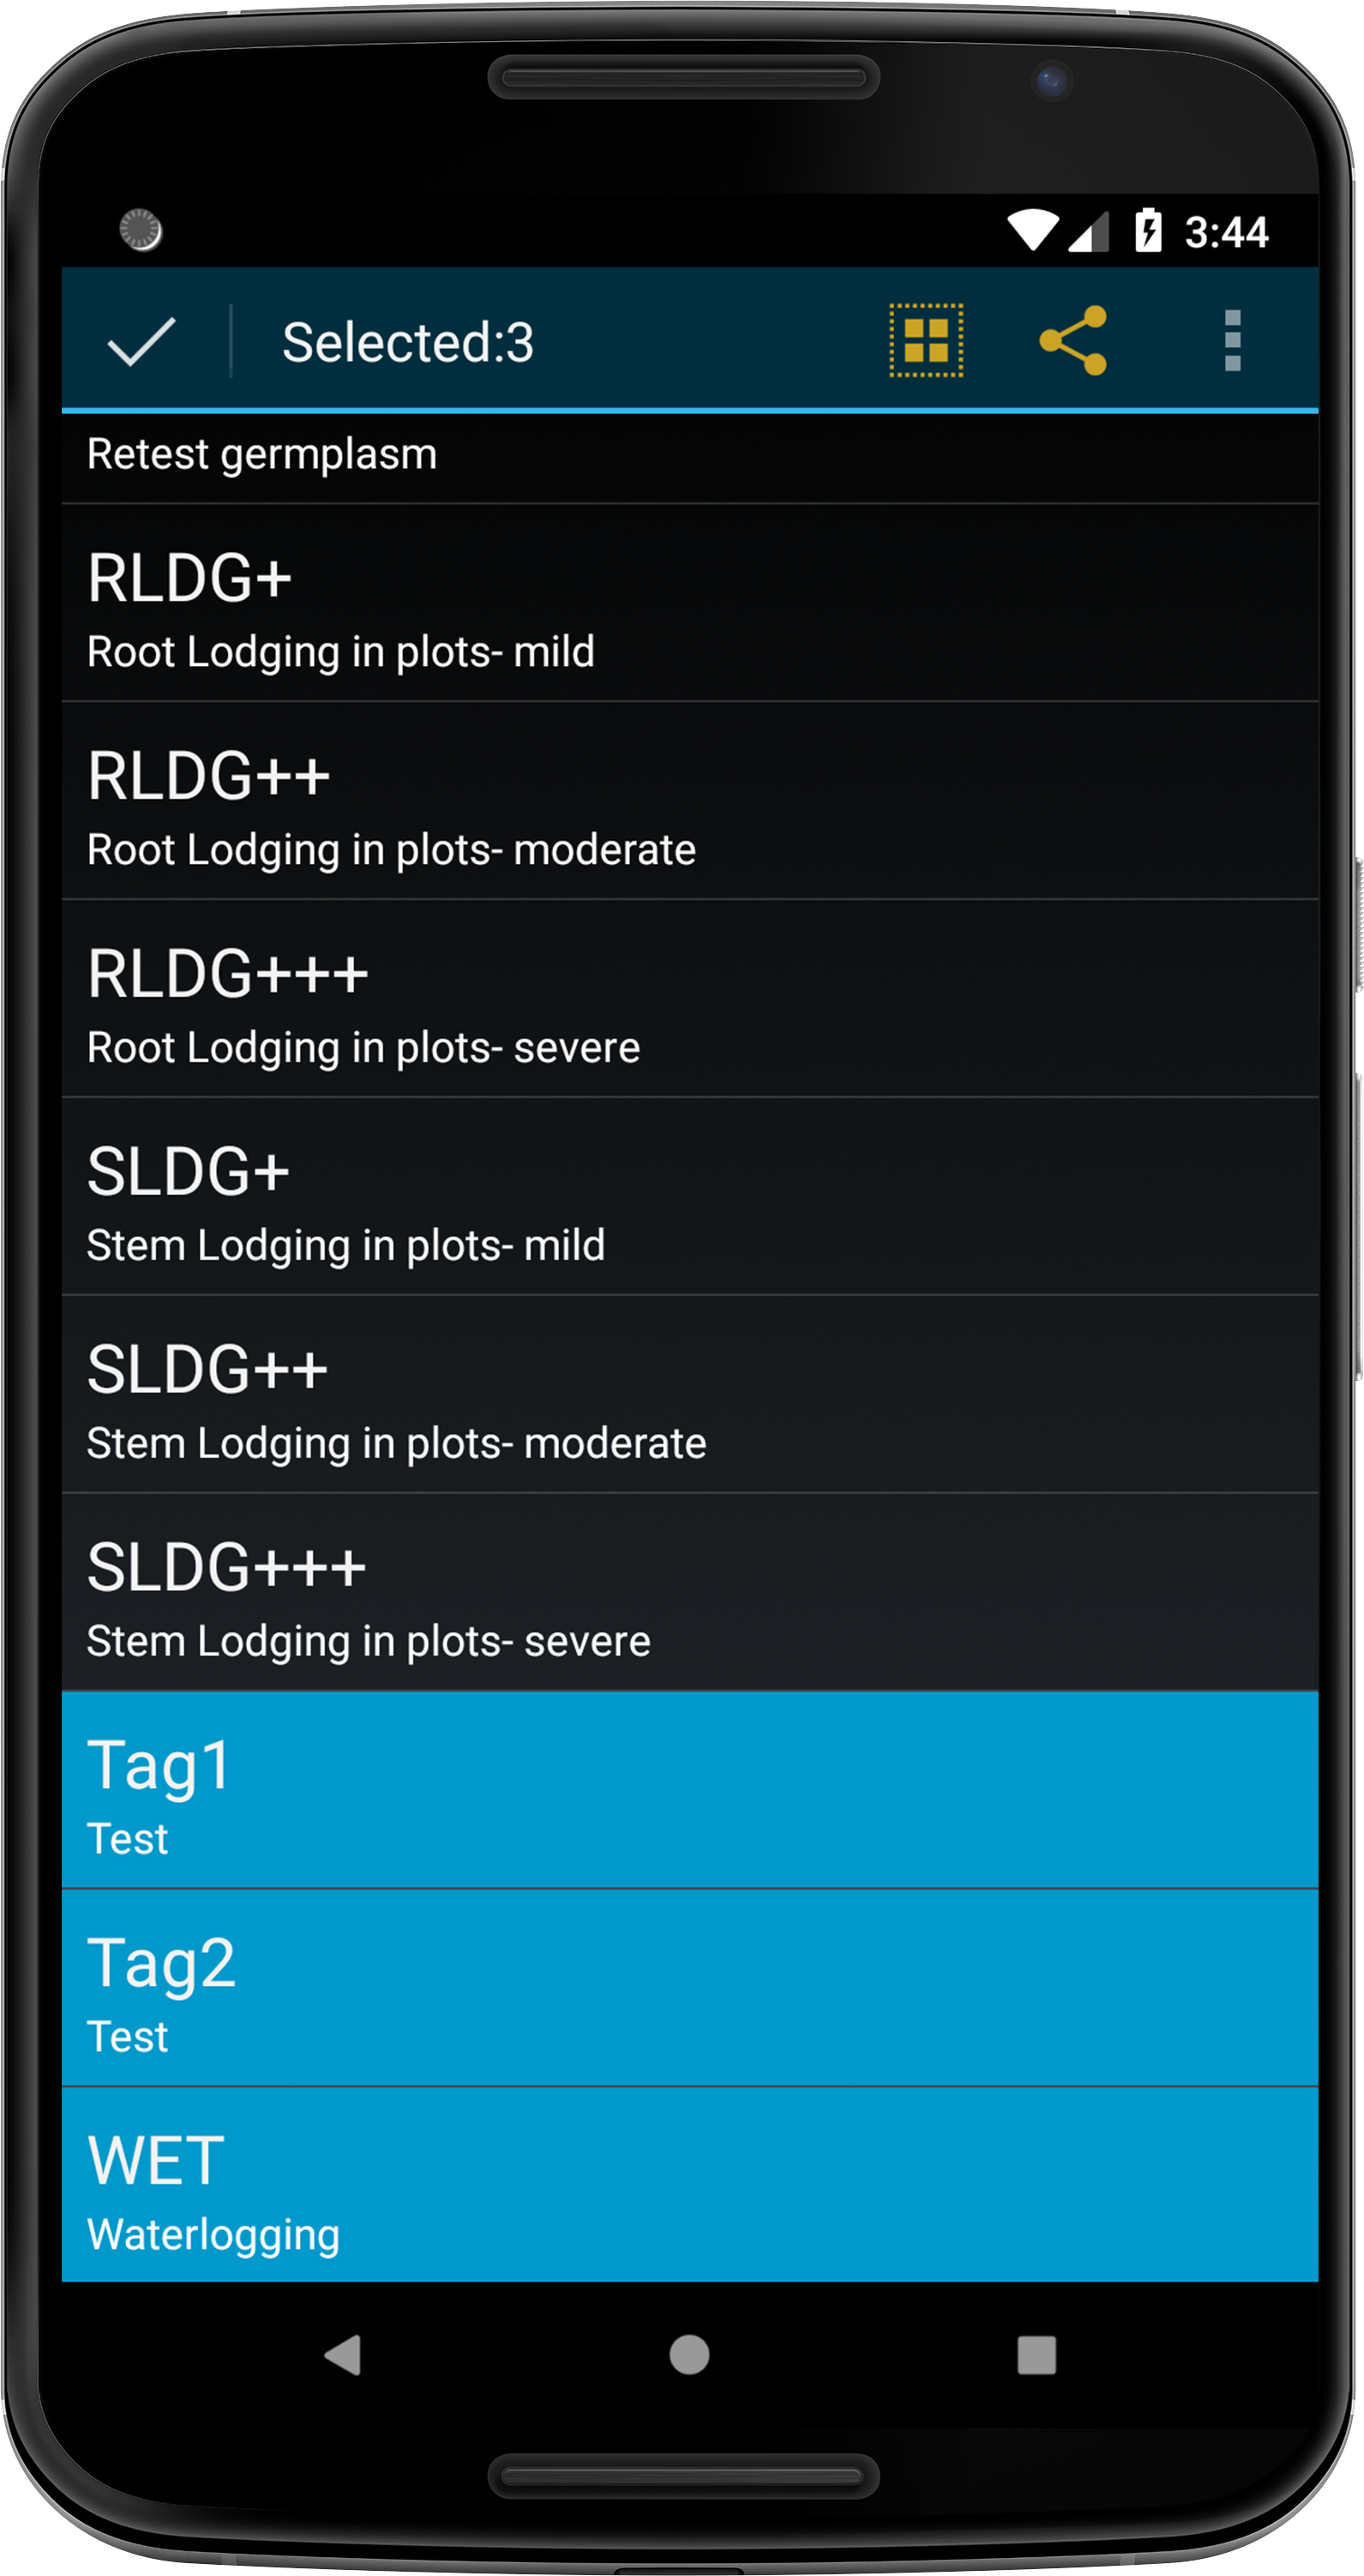
|
2. |
Select the |
3. |
Select the Delete Tags option from the menu items. |
4. |
A message will be displayed that will list any tags that cannot be deleted because they are currently being used in a trial. Select the |


Tag Bundles
Tags can be grouped into bundles to assist with management. Tag bundles can be created in KDSmart and imported/exported from other devices as well. There will always be a bundle that is automatically created called All Tags See the instructions below for how to create a new tag bundle in KDSmart.
Step |
Action |
|---|---|
1. |
Select the tags that you want to create a bundle with by long-pressing a tag and then short-pressing any additional tags. This will allows you to multi-select multiple tags.
|
2. |
Select the |
3. |
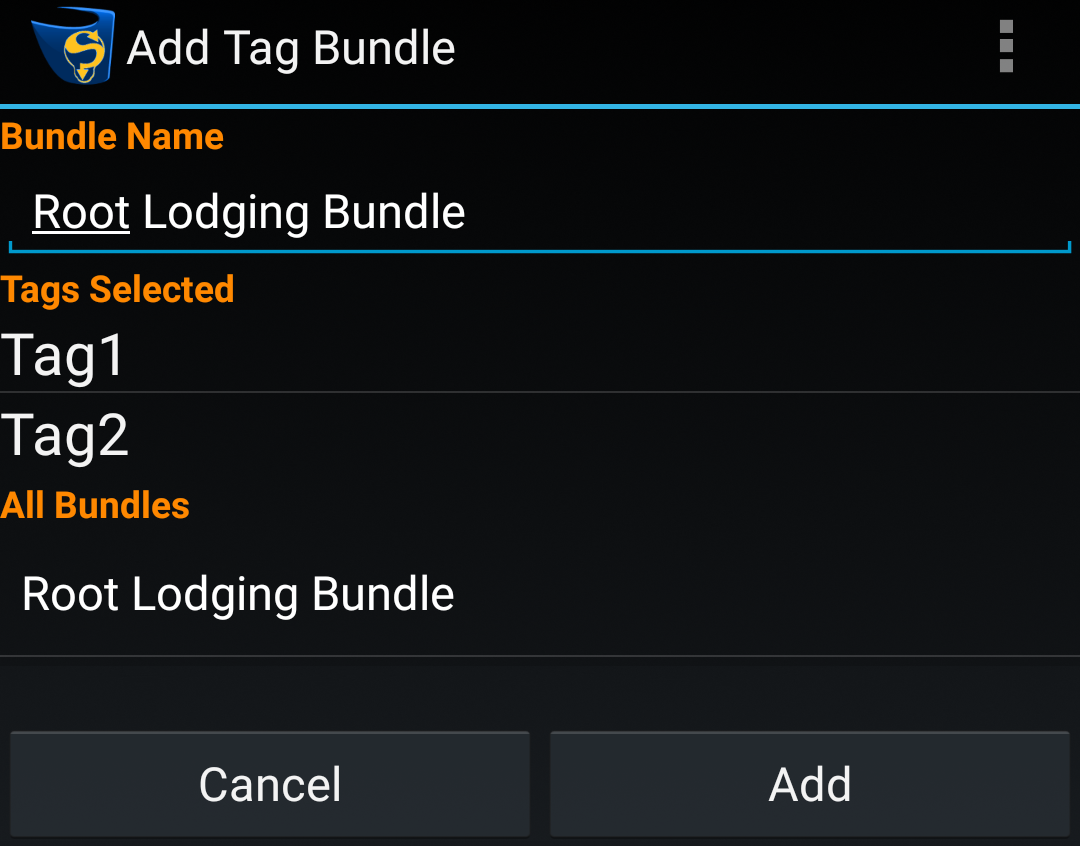
Select the Add Bundle option from the menu items. This will take you to the Add Tag Bundle Screen which lists the selected tags and bundles that have already been created. 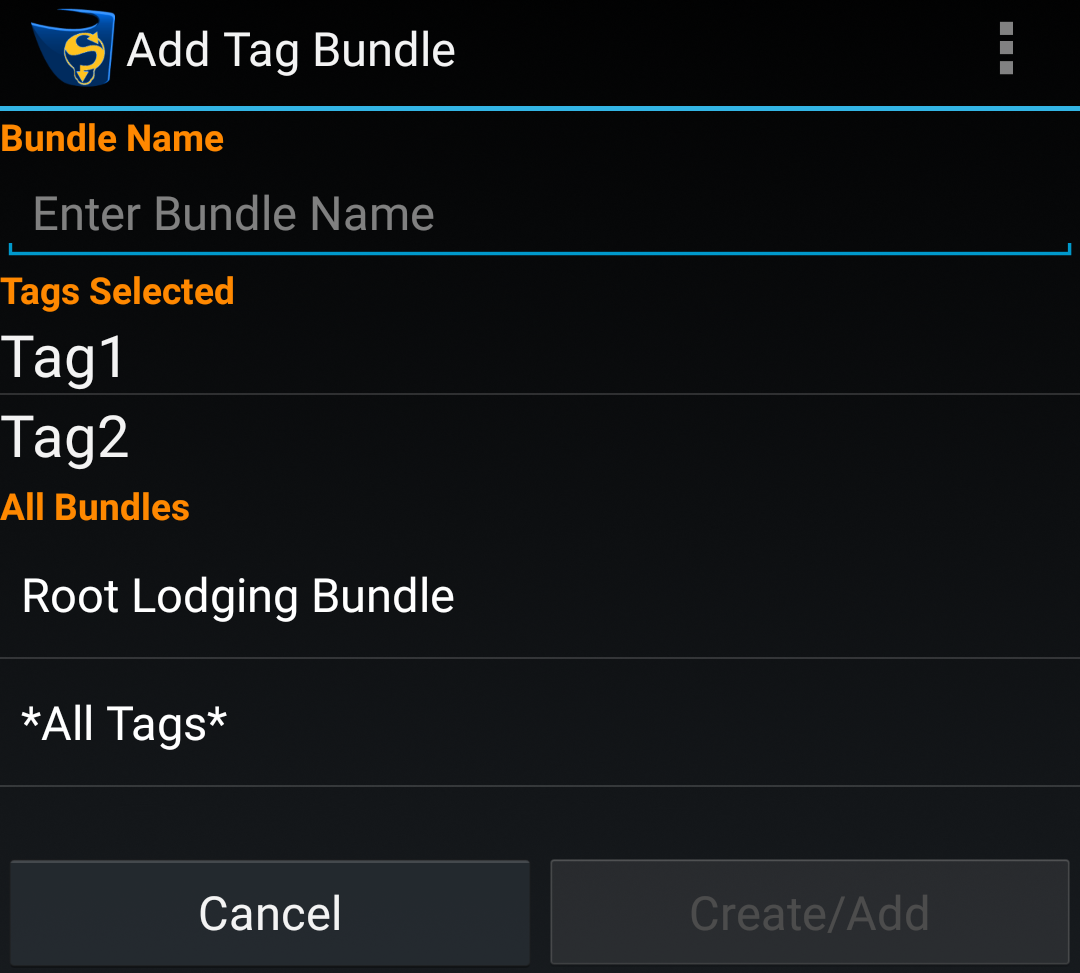
|
4. |
Enter a bundle name and then select the Create/Add Button to create a new bundle. 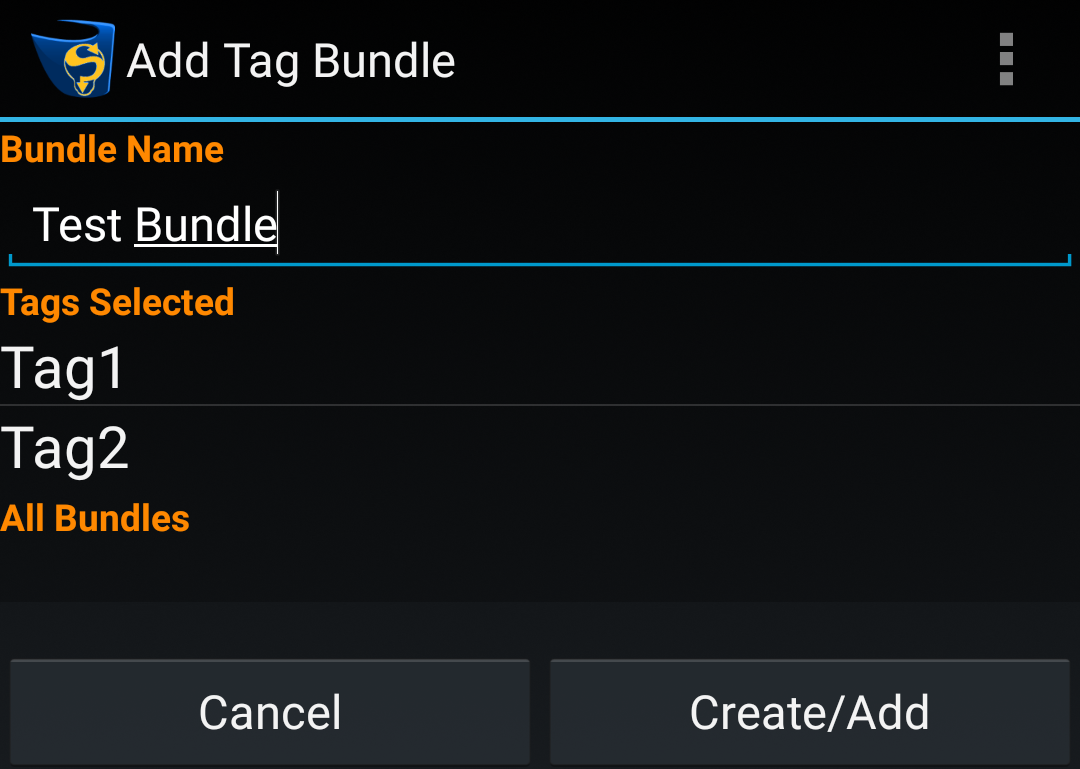
|
5. |
You can also select a current bundle which will display a new Add Button. Select that button to add the selected tags to an existing bundle.
|
Assigning Tags
Along with scoring traits, assigning tags is a part of the scoring process. One or more tags may be assigned to a plot (or sub-plot) or reassigned if required. To assign a tag, follow these steps:
Step |
Action |
|---|---|
1. |
Locate a plot or sub-plot to tag in the Scoring Screen. 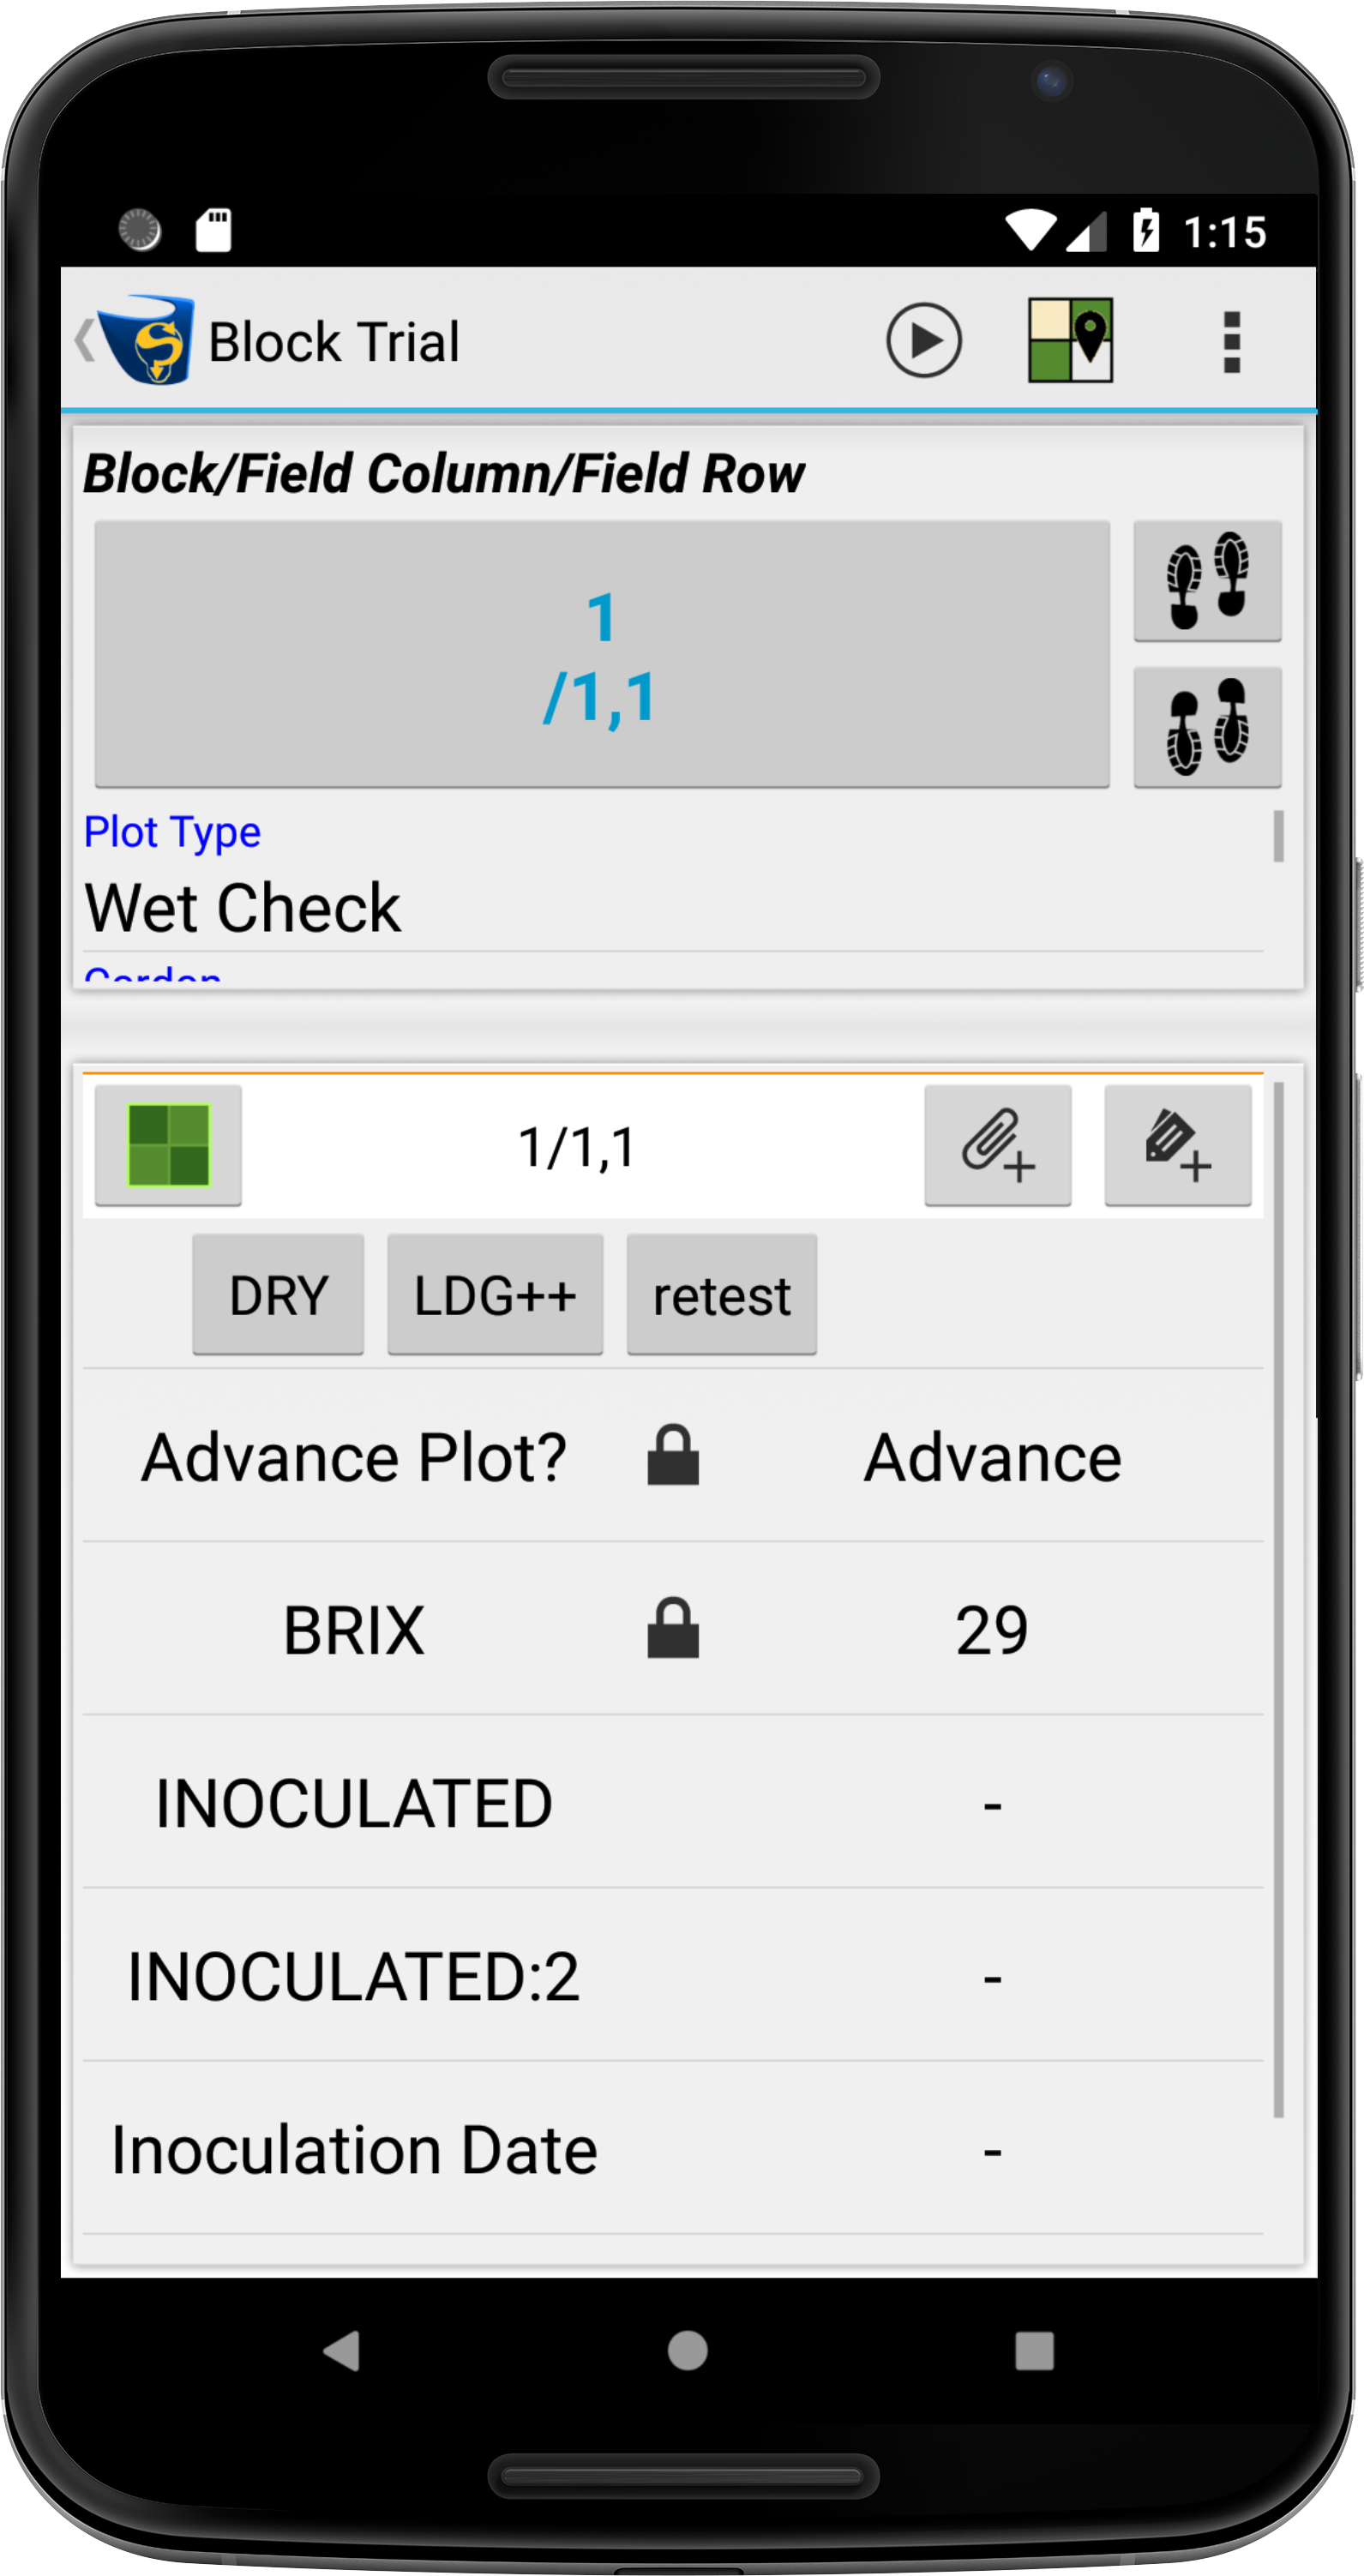
|
2. |
Select the |
3. |
Select one or more tags to assign them to a plot. 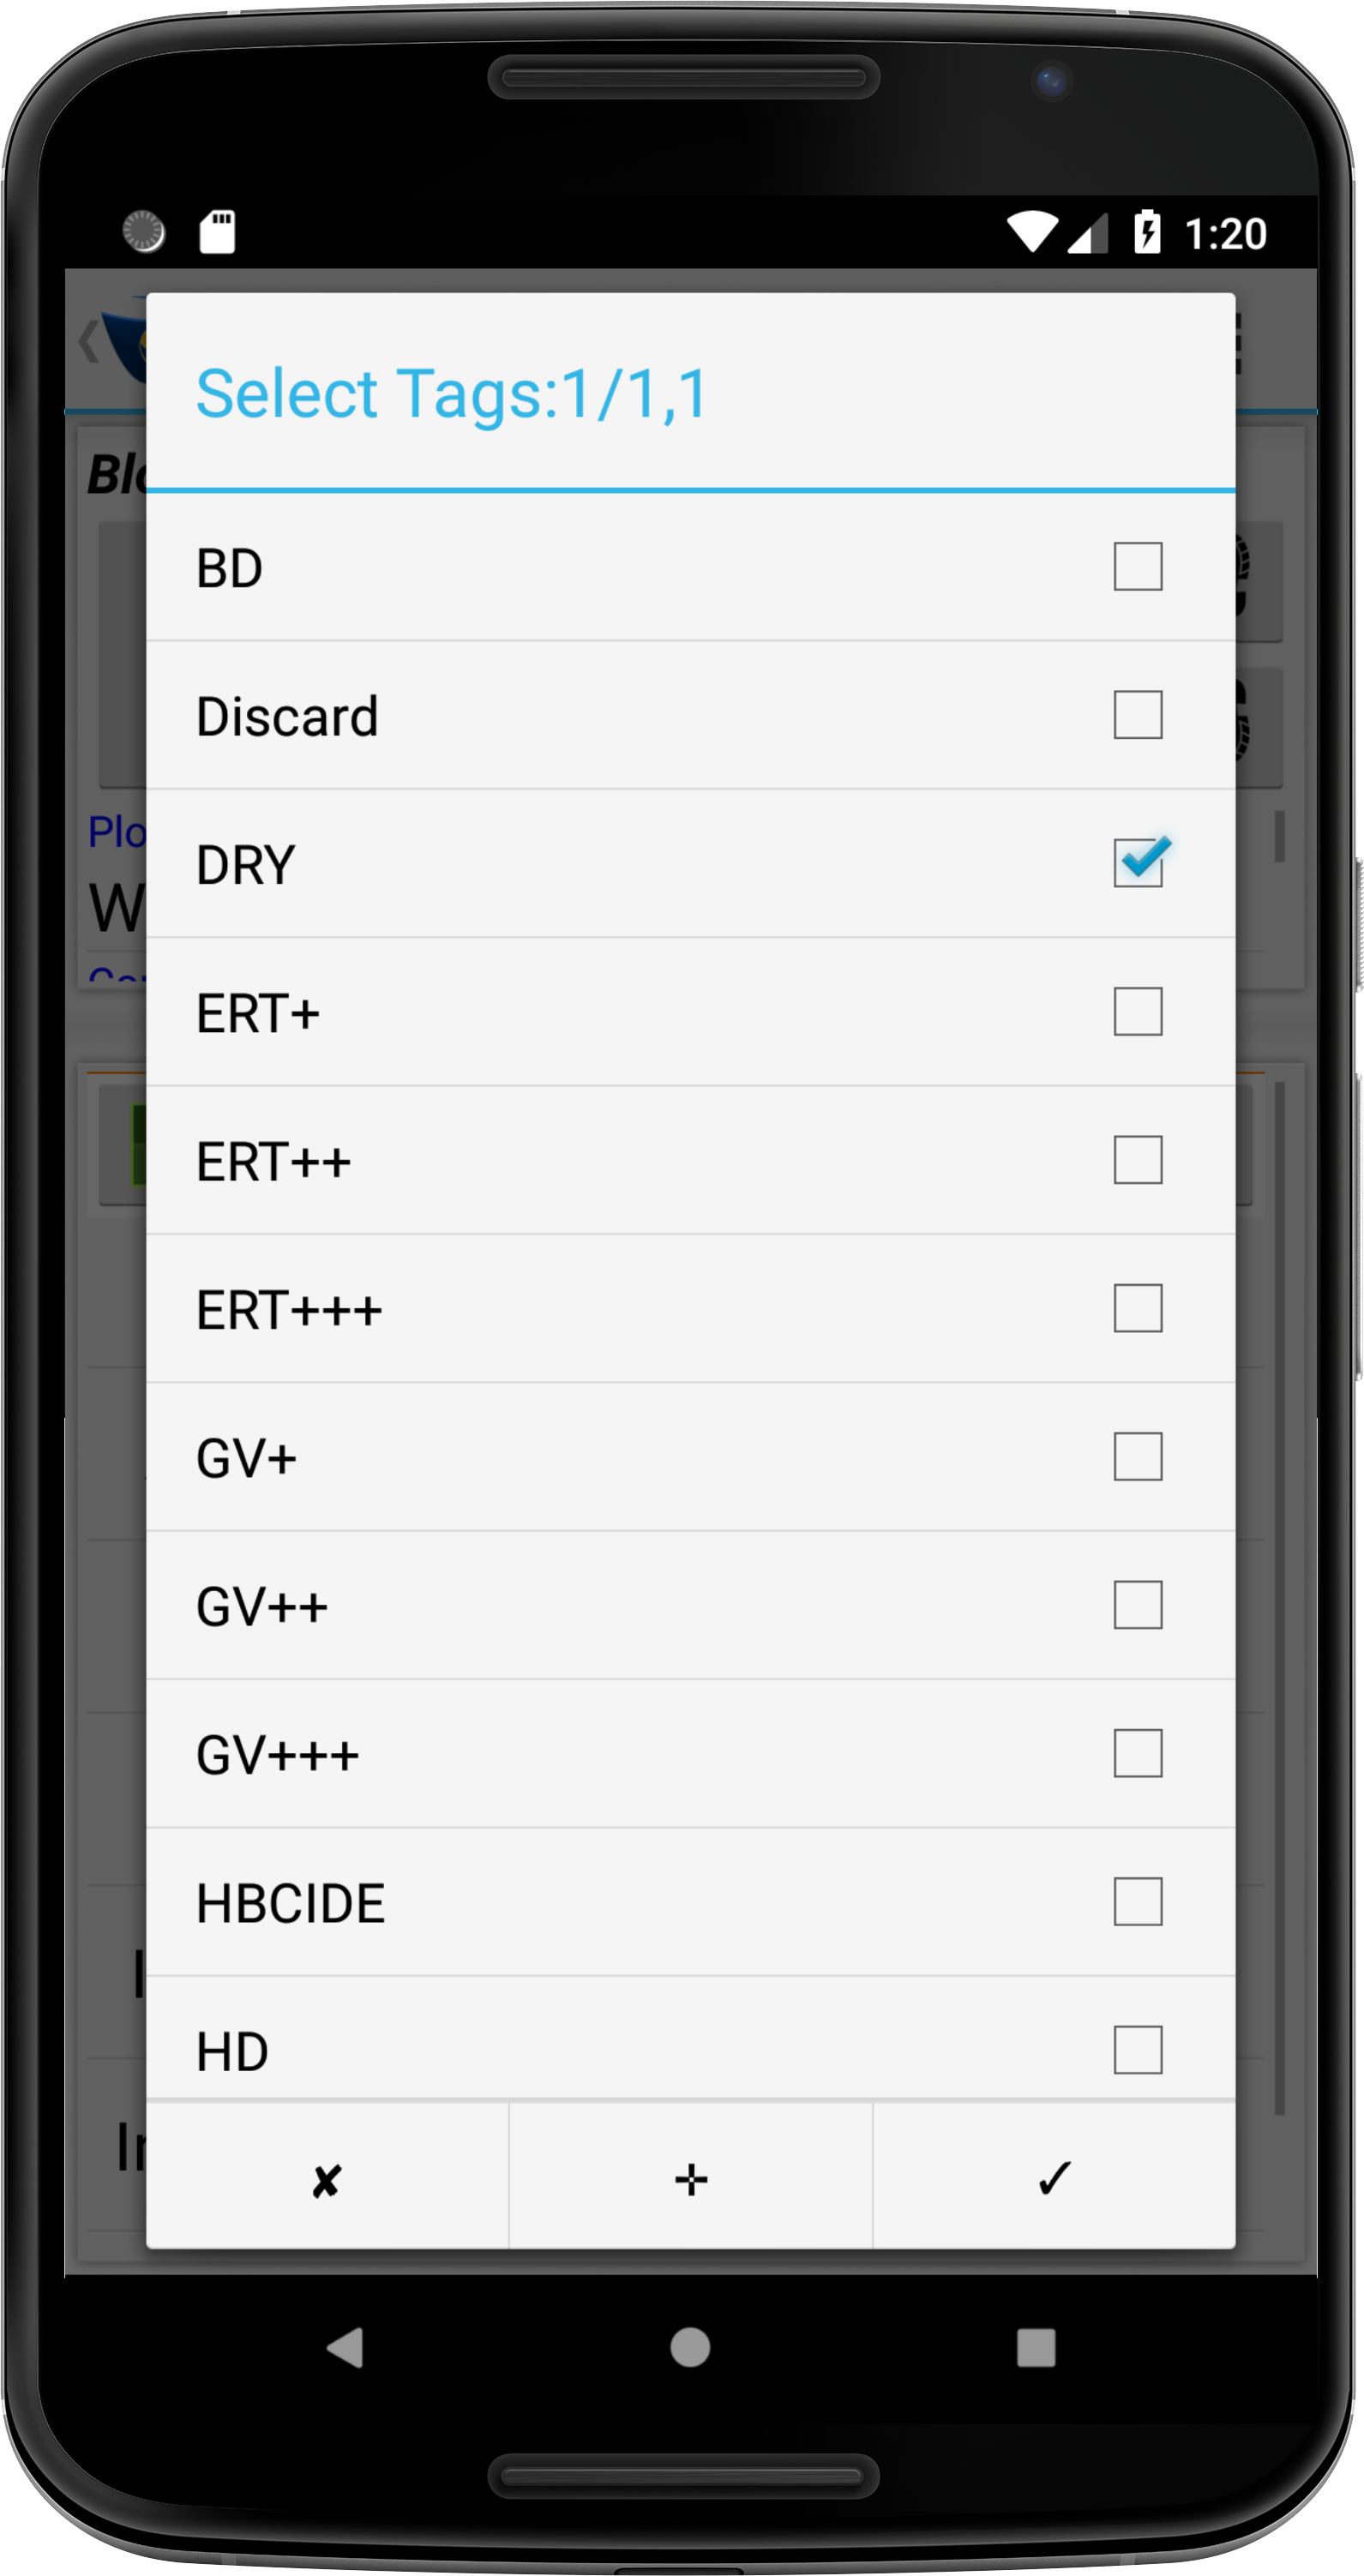
|
4. |
Select the Confirm Button (tick) to save changes and return to the Scoring Screen. This displays the tag short name above the traits for the selected plot. |
Assigning tags is often an integral part of scoring. For more information about scoring see the Scoring page.
Note
Information on importing and exporting data such as tags can be found in the Data Import, Export & Backup page.