Preparing for Scoring
Trials that are scored in KDSmart will require some configuration so that users can score their trials in the way that that is best for their workflow. There are plenty of different configuration options in KDSmart so this section is a guide to preparing for scoring.
Demo vs Production - Where is Your Data Stored?
KDSmart contains two separate local databases on the device; the Production Database for your real work, and the Demo Database for experimenting with KDSmart.
KDSmart helps you identify which database is active in a number of ways:
If you see the
 Lockdown Button at the top of the Home Screen then you are using the Demo Database.
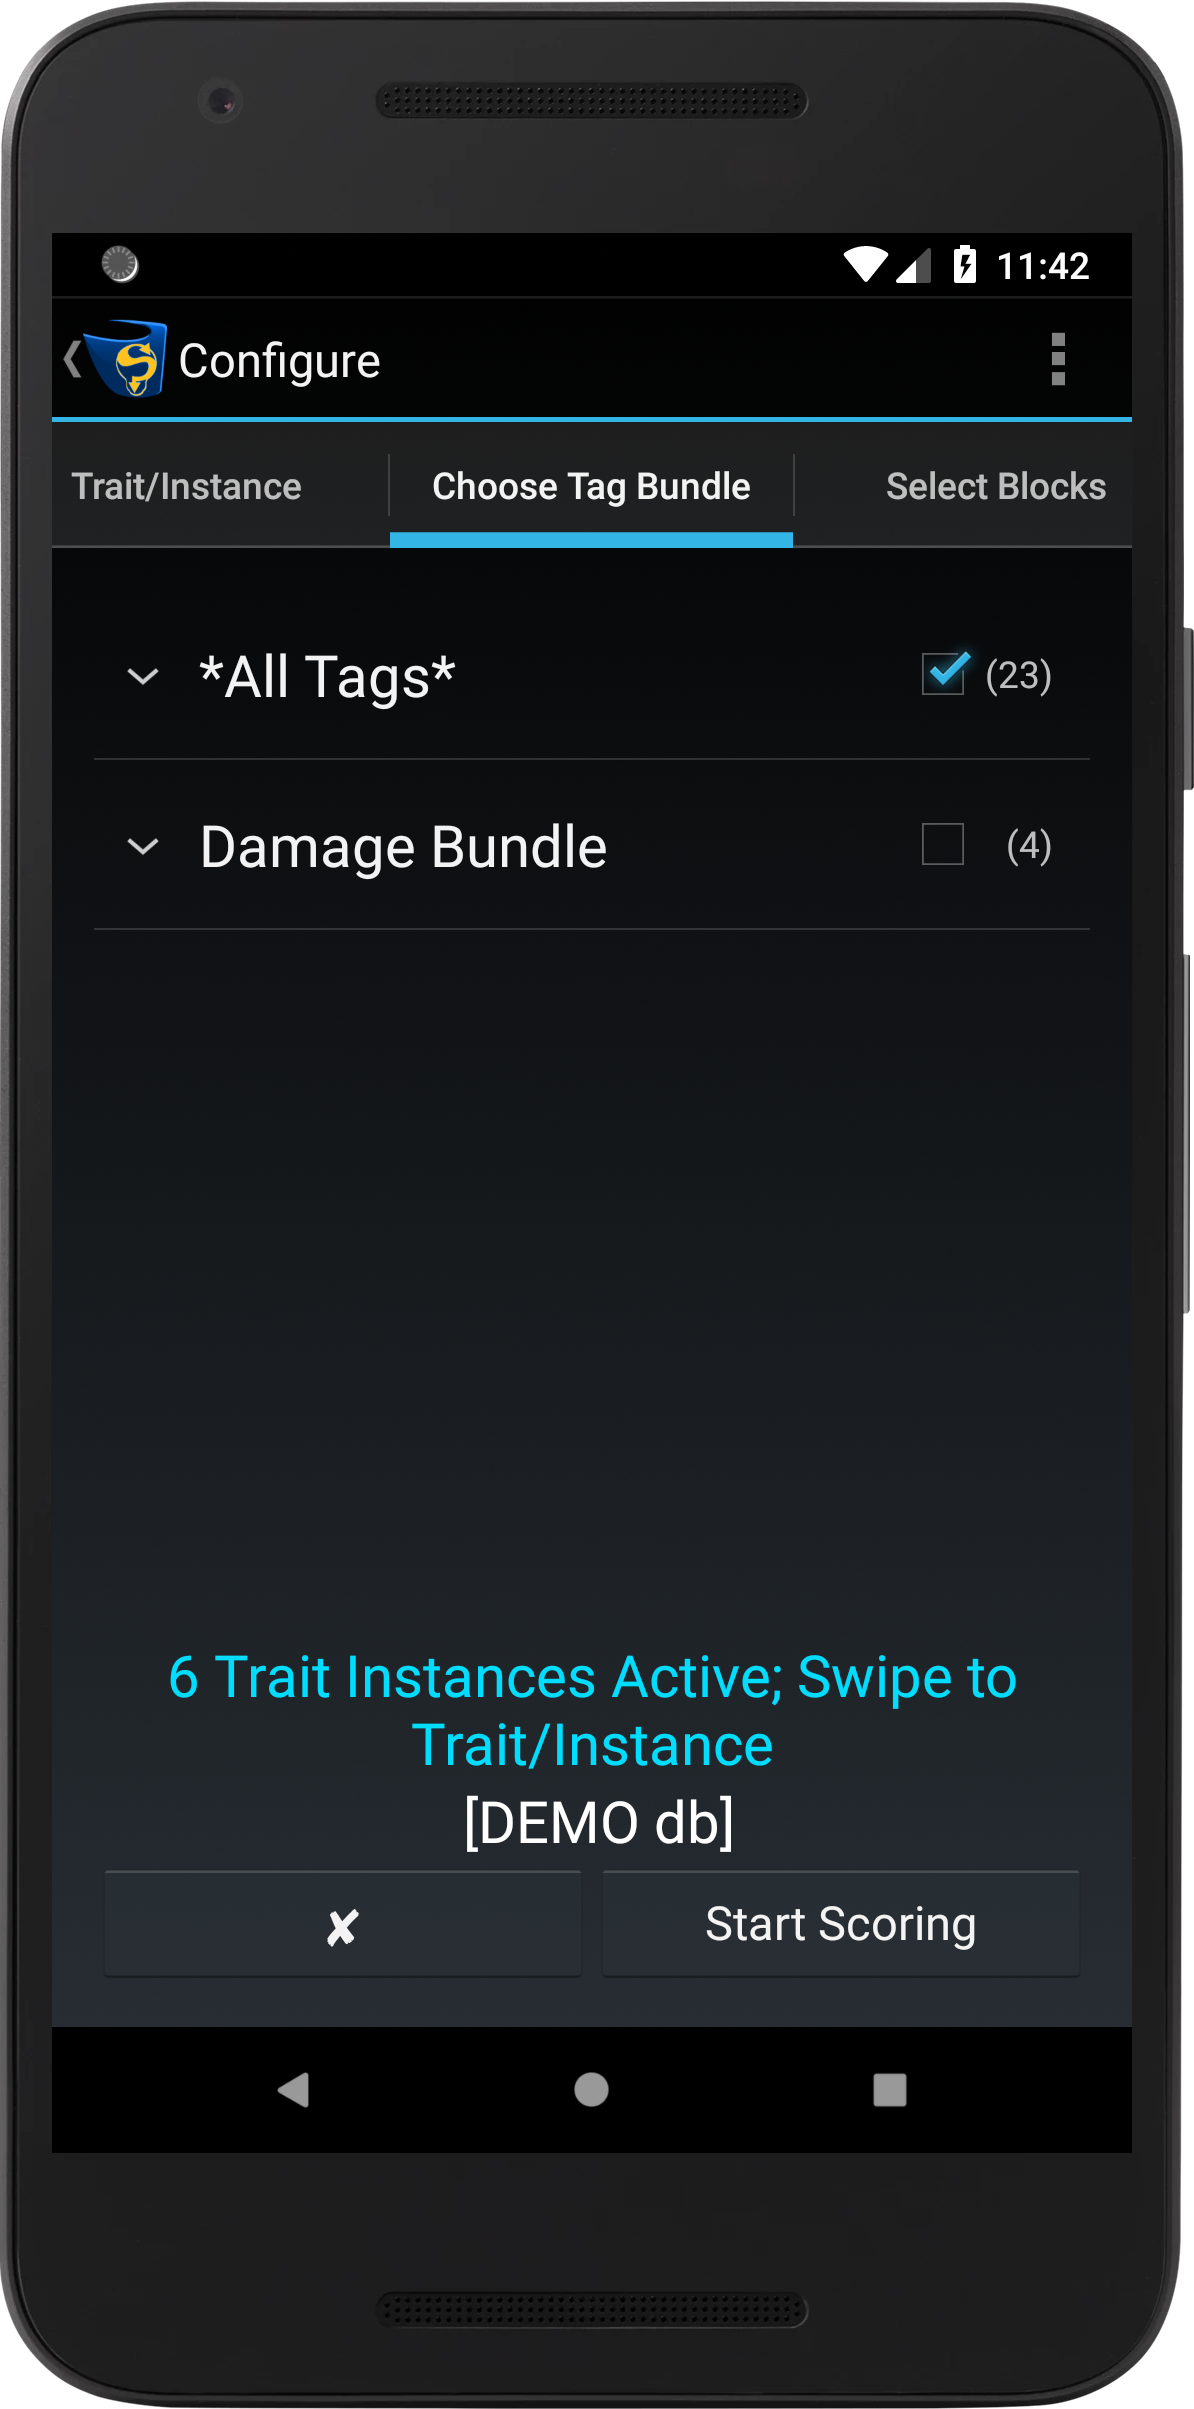
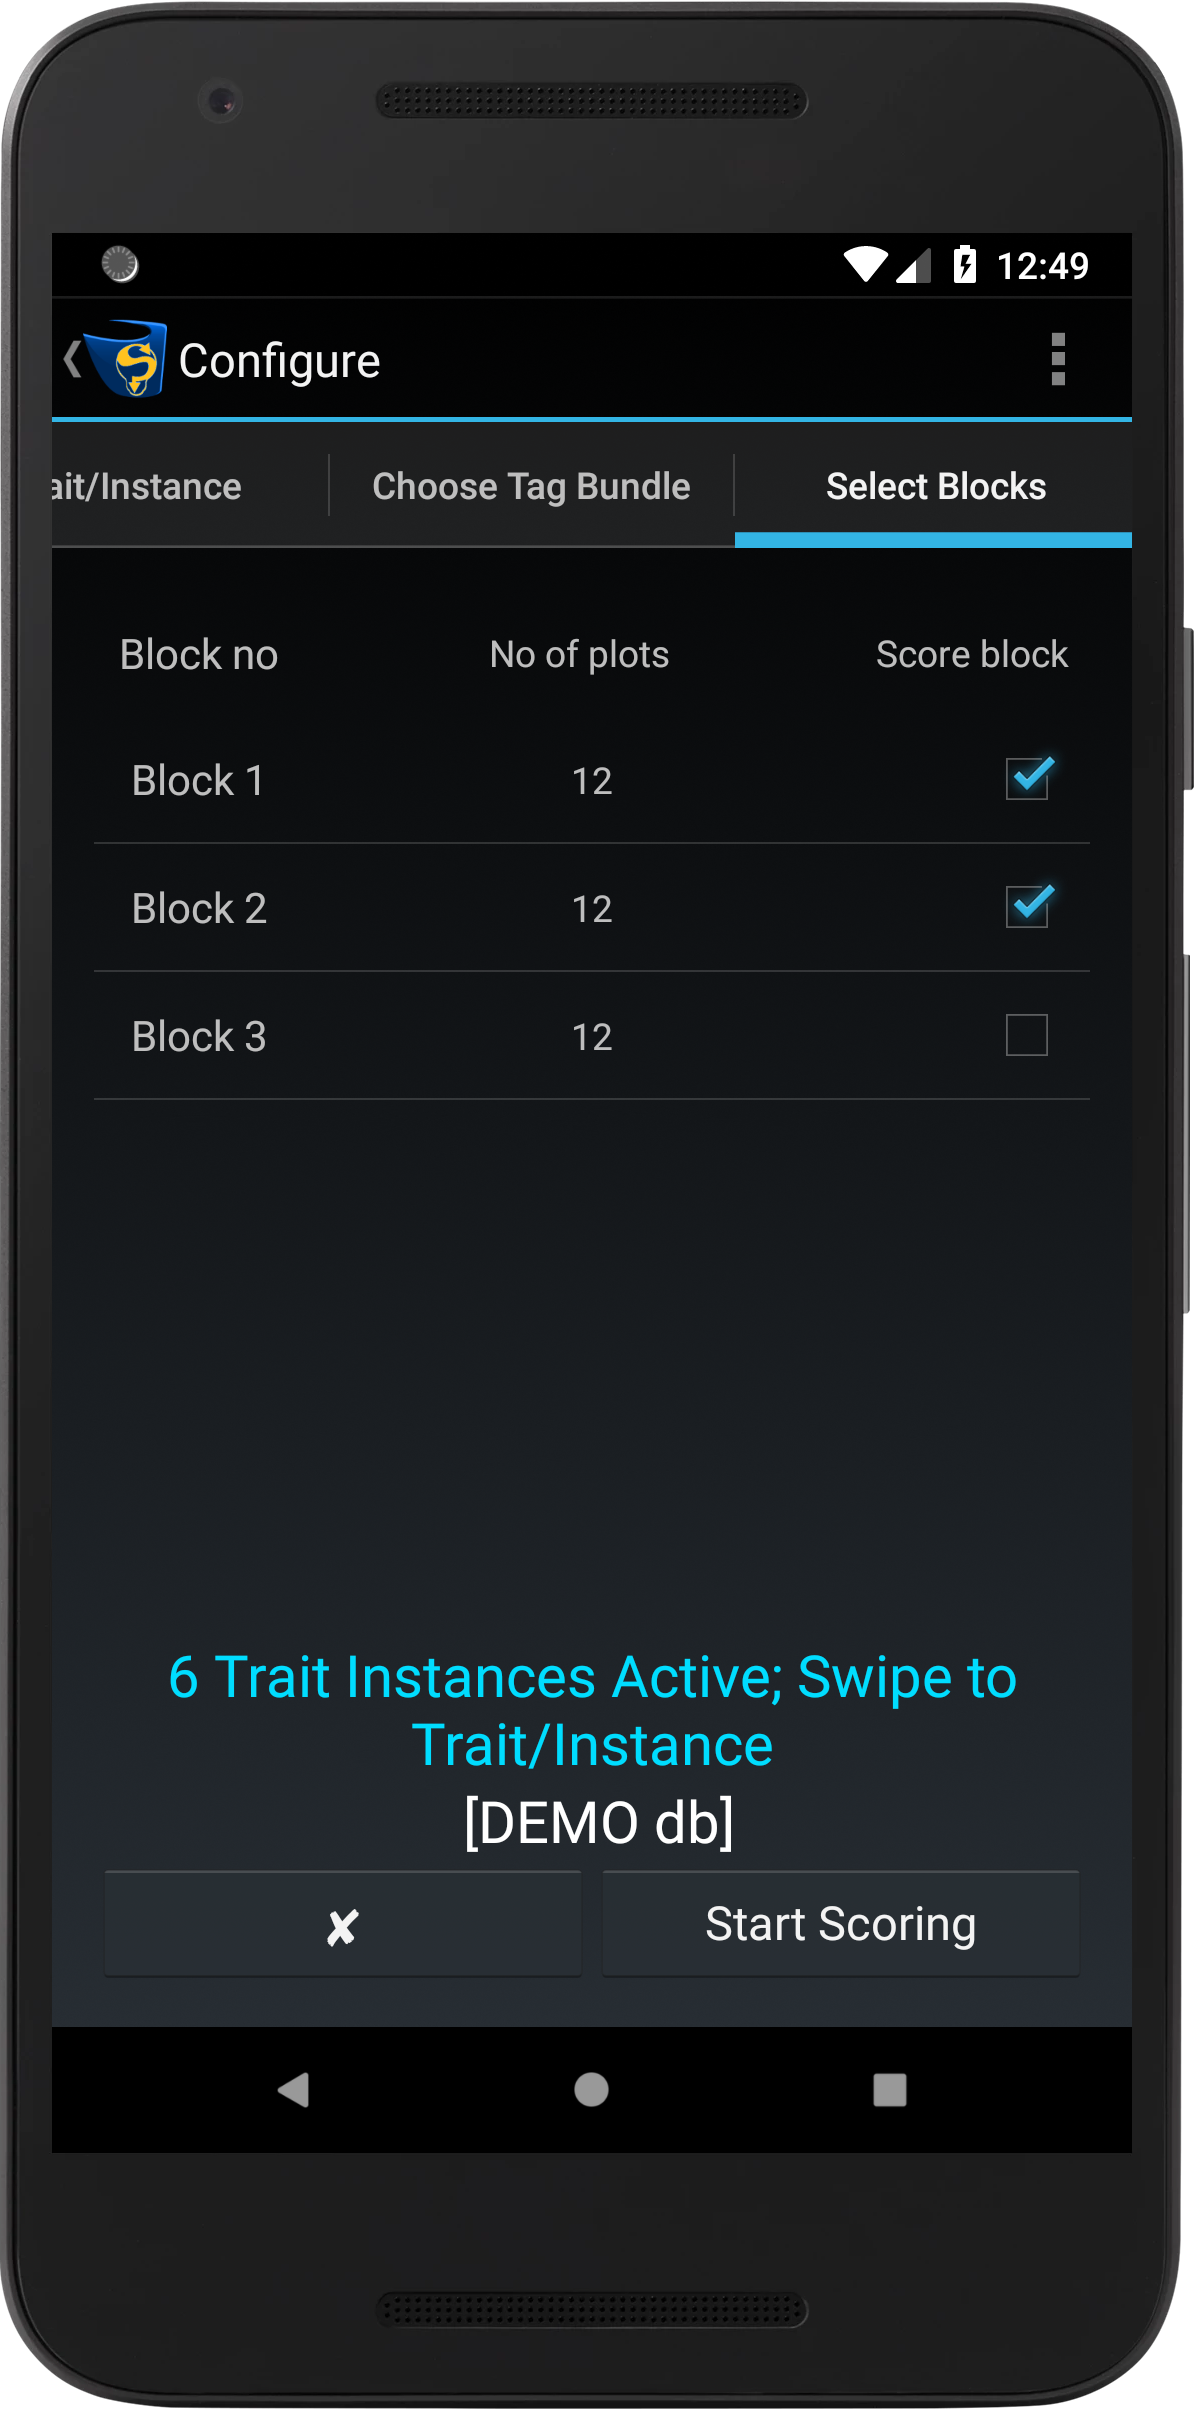
When the Scoring Configuration Screen is presented, there is a [DEMO db] label at the bottom.
The Lockdown Button sets KDSmart into Lockdown Mode. This mode allows you to control the scoring task without enabling users the ability to change settings or trial attributes.
Use this mode when someone else is to perform the scoring and that is ALL they are to do.
To exit Lockdown Mode, a four-digit passcode is required. When the Production Database is active, Lockdown Mode is enabled from the  Settings Screen.
Demo |
|
Production |
|
To change the database, select the Settings Button on the Home Screen or Main Menu to display the Settings Screen. Select the Active Database option then choose the Production or Demo radio buttons.
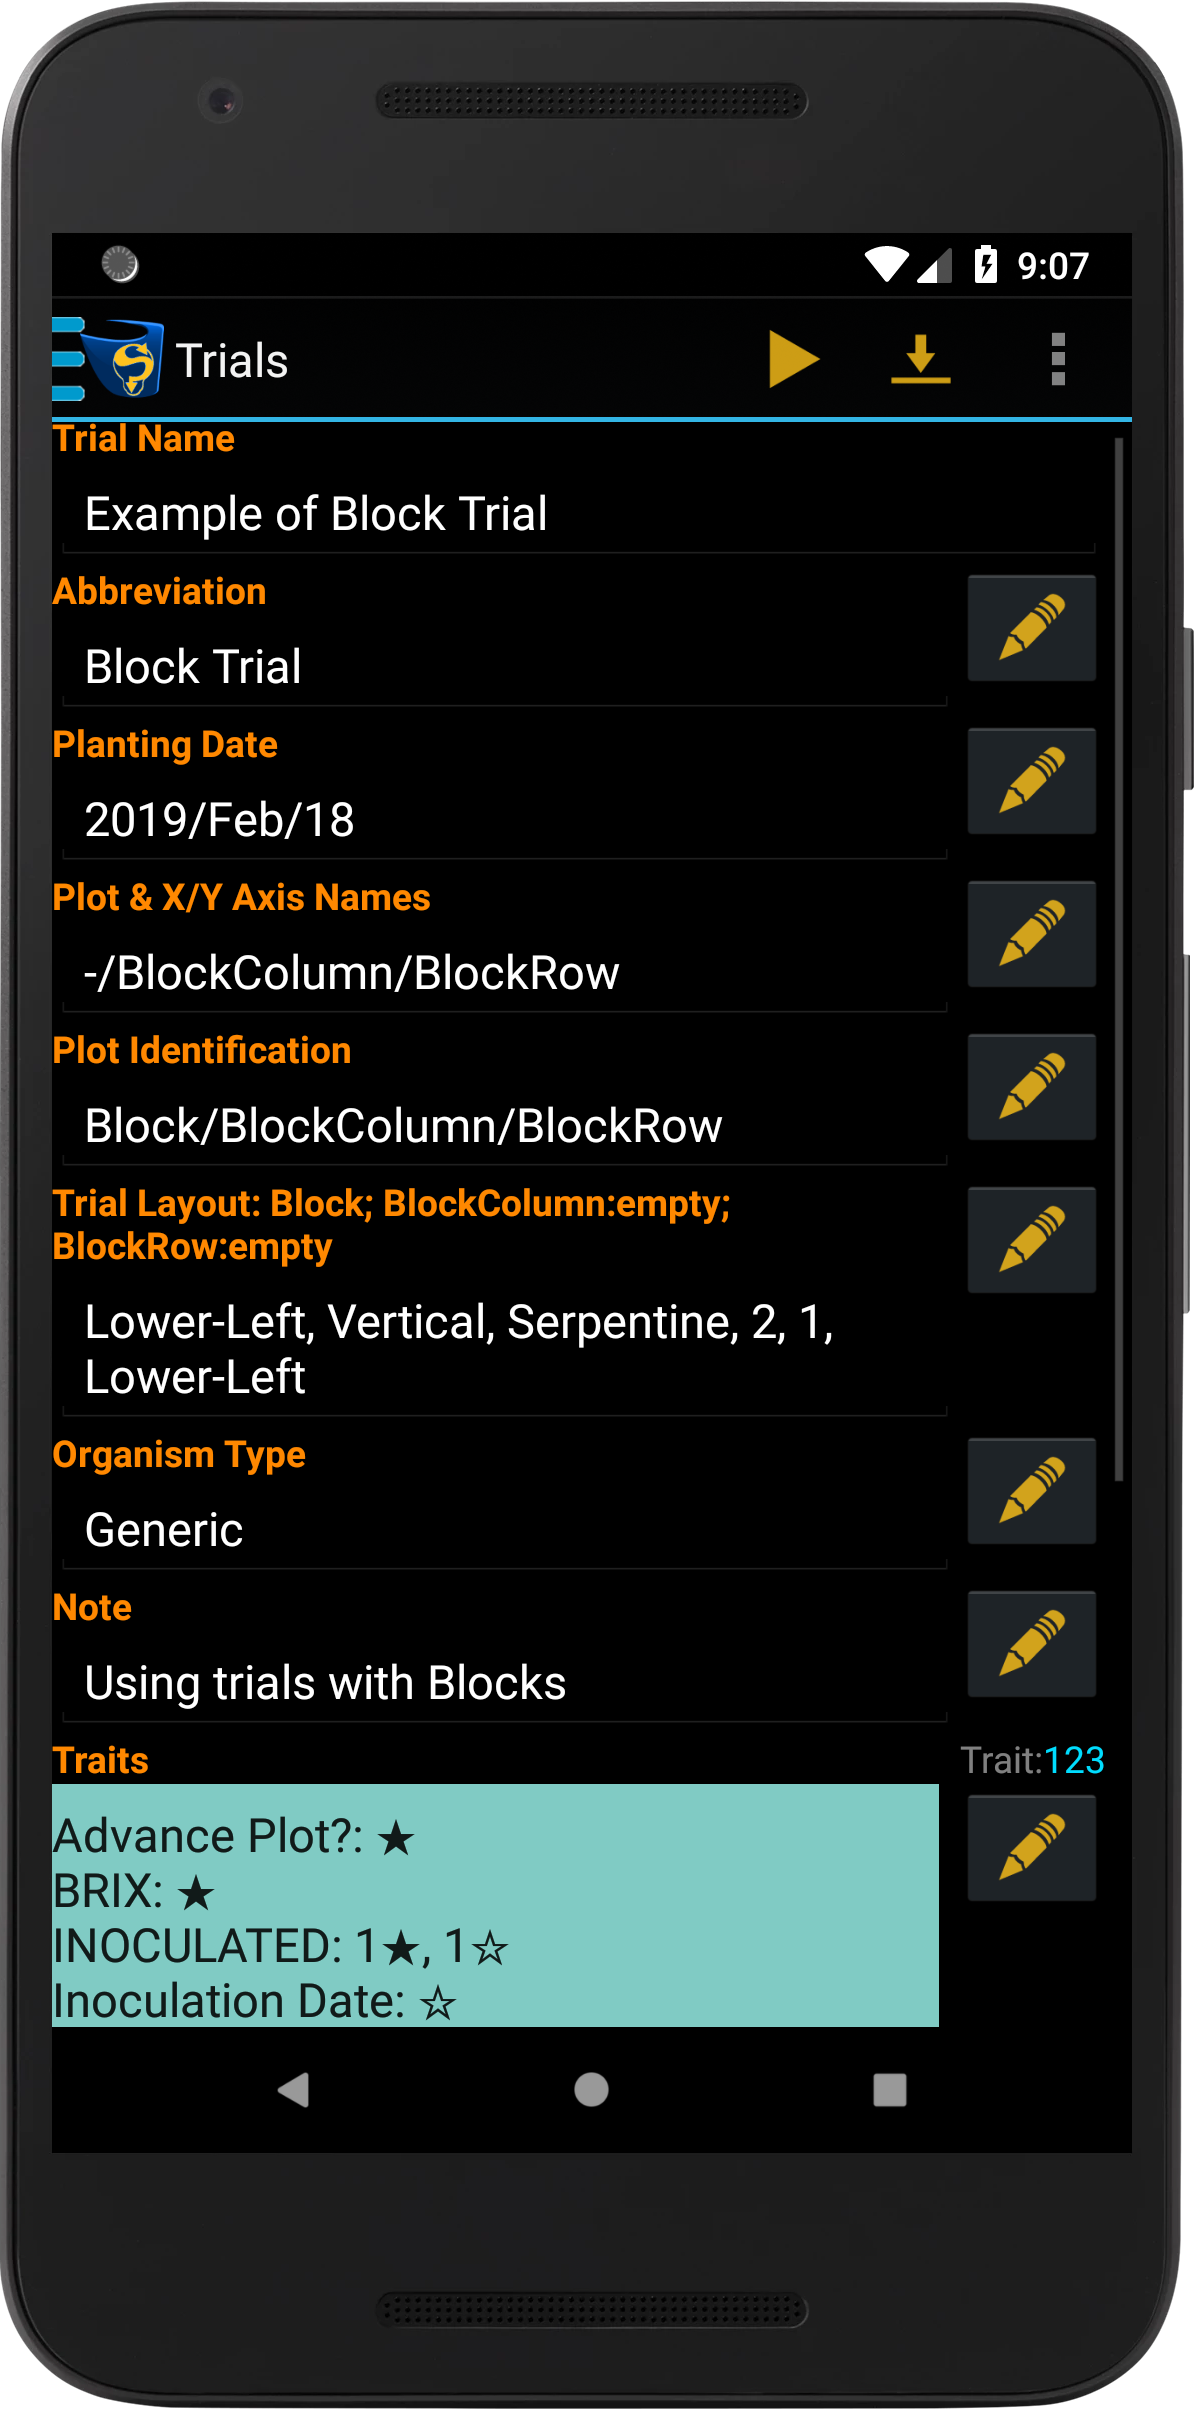
Trial Details
Trial details are the attributes of each trial such as trial layout, organism type, and traits. The Trial Details Screen can be accessed in two ways:
Selecting a trial (with a short press) from the Trials Screen; and
Swiping left/right on the Home Screen until the desired trial is found and then Selecting the Trial Details Button.
When viewing trial details, those trial attributes that can be edited will have an adjacent |
|

The table below provides information on each trial attribute:
Trial Attribute |
Description |
|---|---|
Trial Name |
What the trial will be named in KDXplore or KDSmart. |
Abbreviation |
An abbreviated trial name for display purposes. |
Planting Date |
The date that planting occurred for the trial. Planting date must be set before scoring can commence as the Elapsed Days trait data type will not work unless it has been set. |
Plot & X/Y Axis Names |
Determines the trial element names that are to appear on scoring screens. |
Plot Identification |
How plots are identified e.g. Block/Block Column/Block Row. |
Trial Layout |
At a minimum, there will be an option for choosing the plot origin (starting plot for scoring). Depending on the trial, there may be more options such as block plot origin. |
Organism Type |
Provides a choice of the symbol to represent the organism on screen. |
Note |
A text note for the trial. |
Traits |
Trials may have many traits, however, it is not necessary or desirable for them all to be visible when scoring and traits can be made visible or hidden as required. Select the Edit Button to change traits that are used. |
Trial Attributes |
Non-editable from import |
Plot Types |
Non-editable from import |
Plot Attributes |
Non-editable from import |


Collection Parameters
Most of the important collection parameters (scoring options) can be found on the Scoring Configuration Screen. Swipe left and right between the tabs to view all of the options. The tables below outline the function or options available in each tab and the sections provide more in-depth information.
Options
Options |
Example Image |
|---|---|
Collection Order:
Scoring View:
|
|


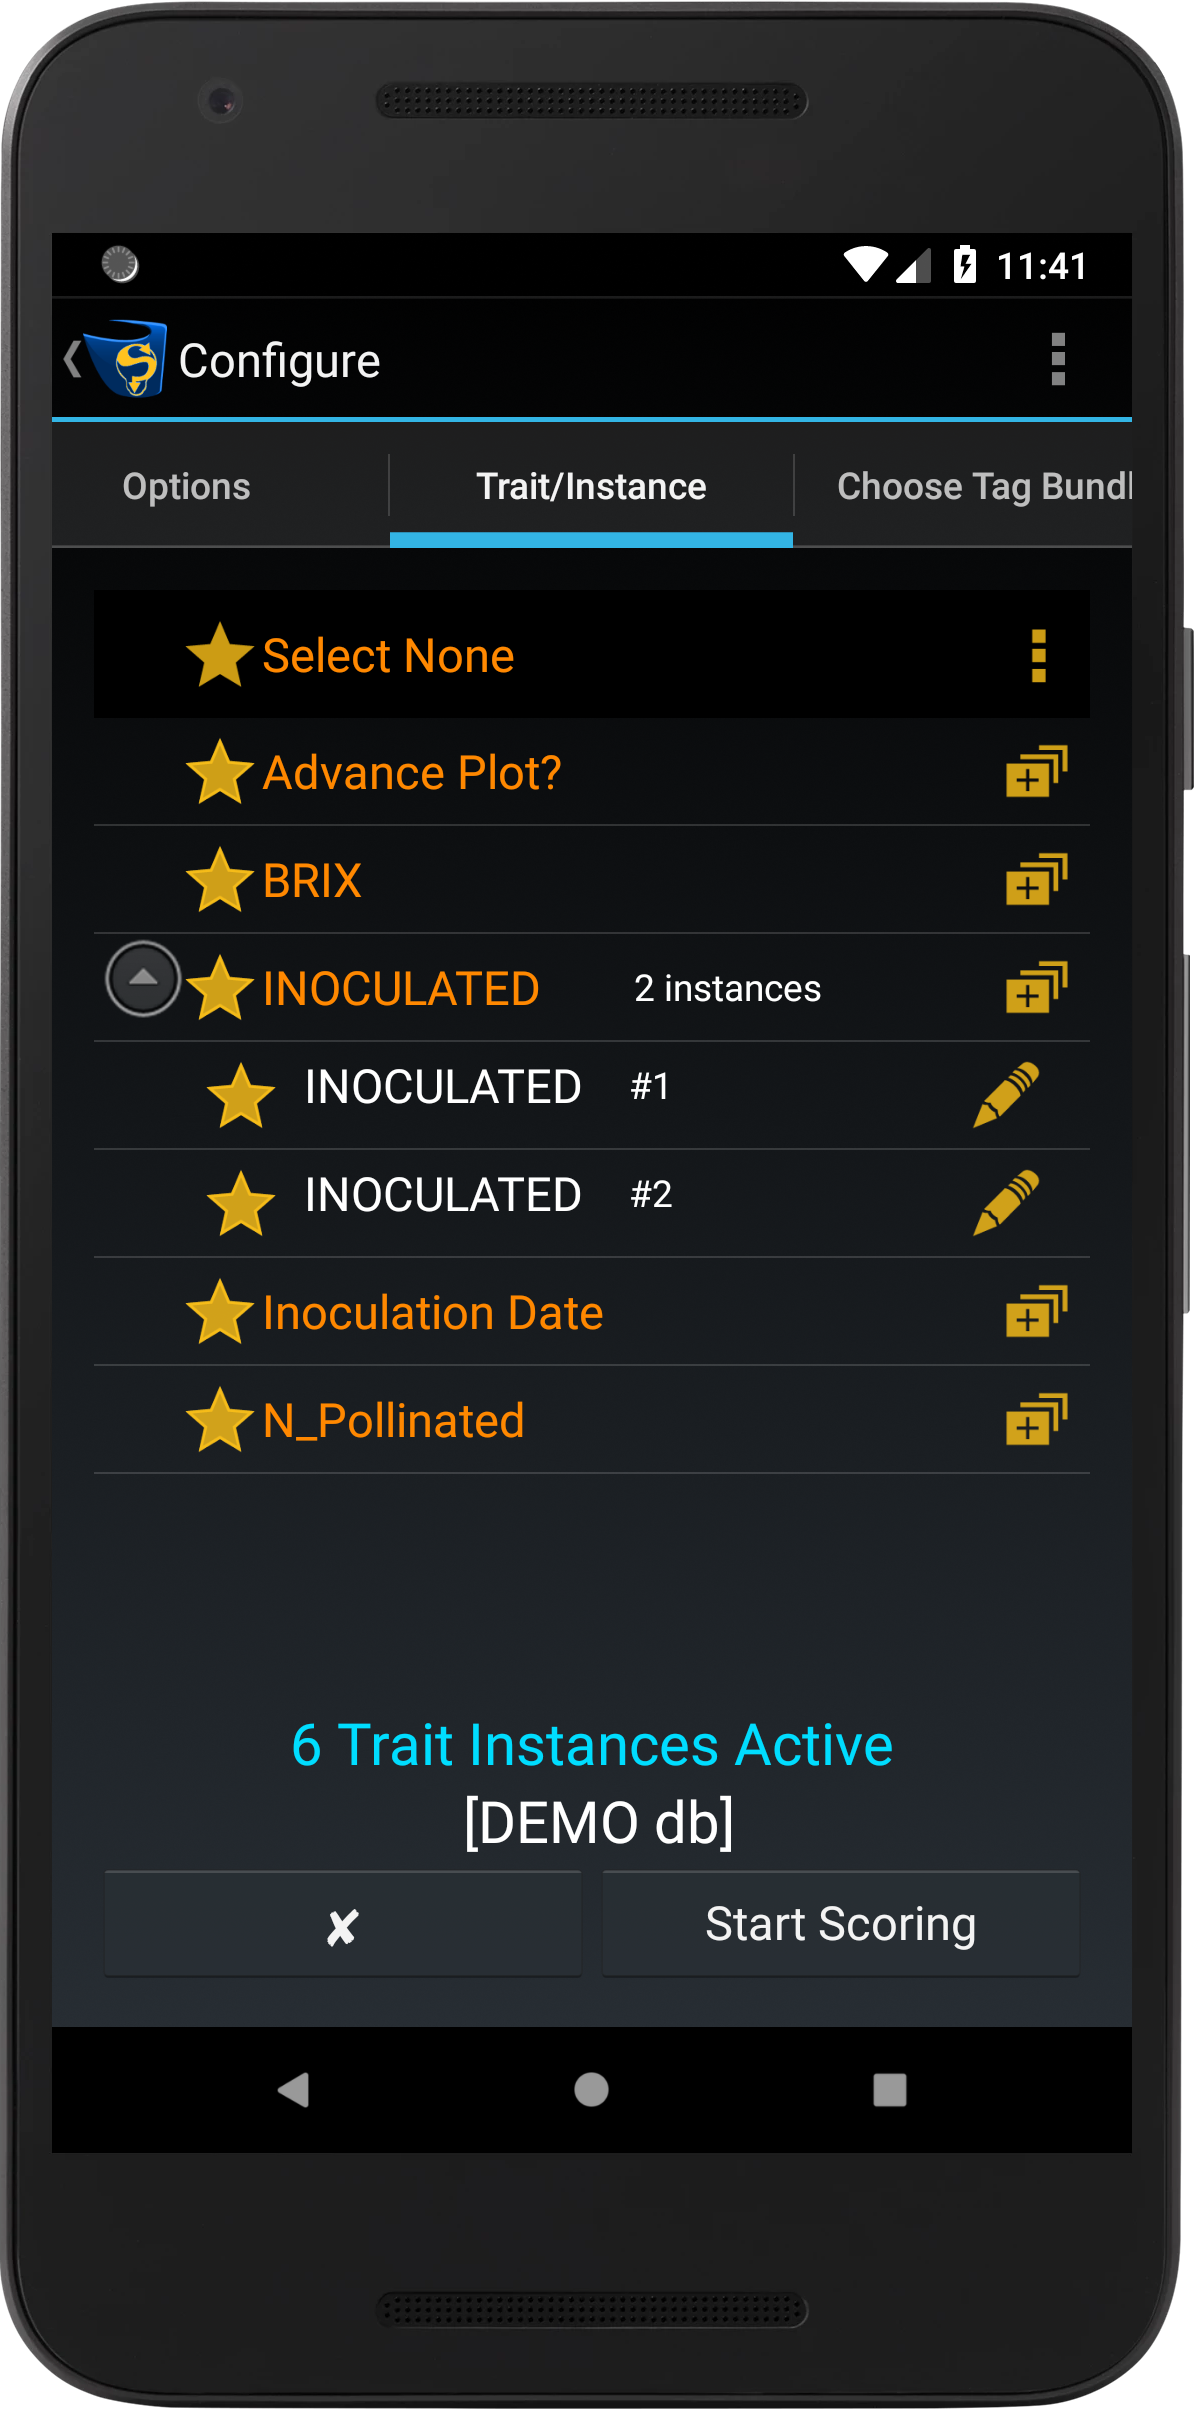
Trait/Instance
Options |
Example Image |
|---|---|
Selecting/Deselecting Traits: Star Icons can select or deselect a trait or trait instance for scoring (sets the trait as active or inactive). Setting a trait/instance as inactive does not remove the trait from the trial but removes it from the Scoring Screen to prevent unnecessary scrolling.
The Menu Button provides options for adding traits or changing the trait scoring order.
|
|
Enabled management of traits that are to be scored.
|
See above image |
Options for editing or removing trait instances.
|
See above image |


Start Scoring
Scoring can be started in a variety of ways in KDSmart as outlined in the table below:
Method |
Action |
|---|---|
Quick-start from the Home Screen |
Swipe left and right between the displayed trials until you find the trial that you want to score. Select the |
Trial Details from the Home Screen |
Swipe left and right between the displayed trials until you find the trial that you want to score. Select the Trial Details Button and change any of the details if you wish then select the |
Quick-start from the Trials Screen |
If there is currently a trial selected, select the |
Trial Details from the Trials Screen |
Select a trial to immediately display the Trial Details Screen. Select the |

Once all configuration options have been set, scoring can begin. See the Scoring page at: http://www.kddart.org/help/kdsmart/html/kdsmarthelp.html for more information.