Creating and Using Barcodes
The ability to attach barcodes to plots and sub-plots in the field ensures that scoring is fast, efficient, and accurate. Furthermore, barcode scanning could previously be done by attaching an external scanner to a mobile device but with the 3.0.26 update to KDSmart, the camera on your device can be used to scan barcodes. This has made scanning much easier and accessible to all KDSmart users. The purpose of this tutorial is to demonstrate how to create barcodes for your trial, export them as a PDF to be printed, and then how to scan them in KDSmart.
To begin this tutorial, you will need to have KDXplore installed on a computer and KDSmart on a mobile device. More information about installation of these programs can be found in the Installation section. Additionally, you will need a program called TextToBarcodePDF for adding barcodes to a PDF document. If you do not have this then please email kdxplore@diversityarrays.com and request a copy. You will also need a trial to use to generate barcodes from. If you do not have your own trial then feel free to use the maize-with-data.csv file that we will be using during this tutorial. It can be found in the Training Sample Data section and is available for download.
Table of Contents
Note
Select any heading to expand/display  or contract
  the section.
Step 1 - Generate Barcodes
Barcodes can be created in KDXplore. Once you have opened KDXplore and have a trial ready then follow the instructions below to create your barcodes.
| Step | Action |
|---|---|
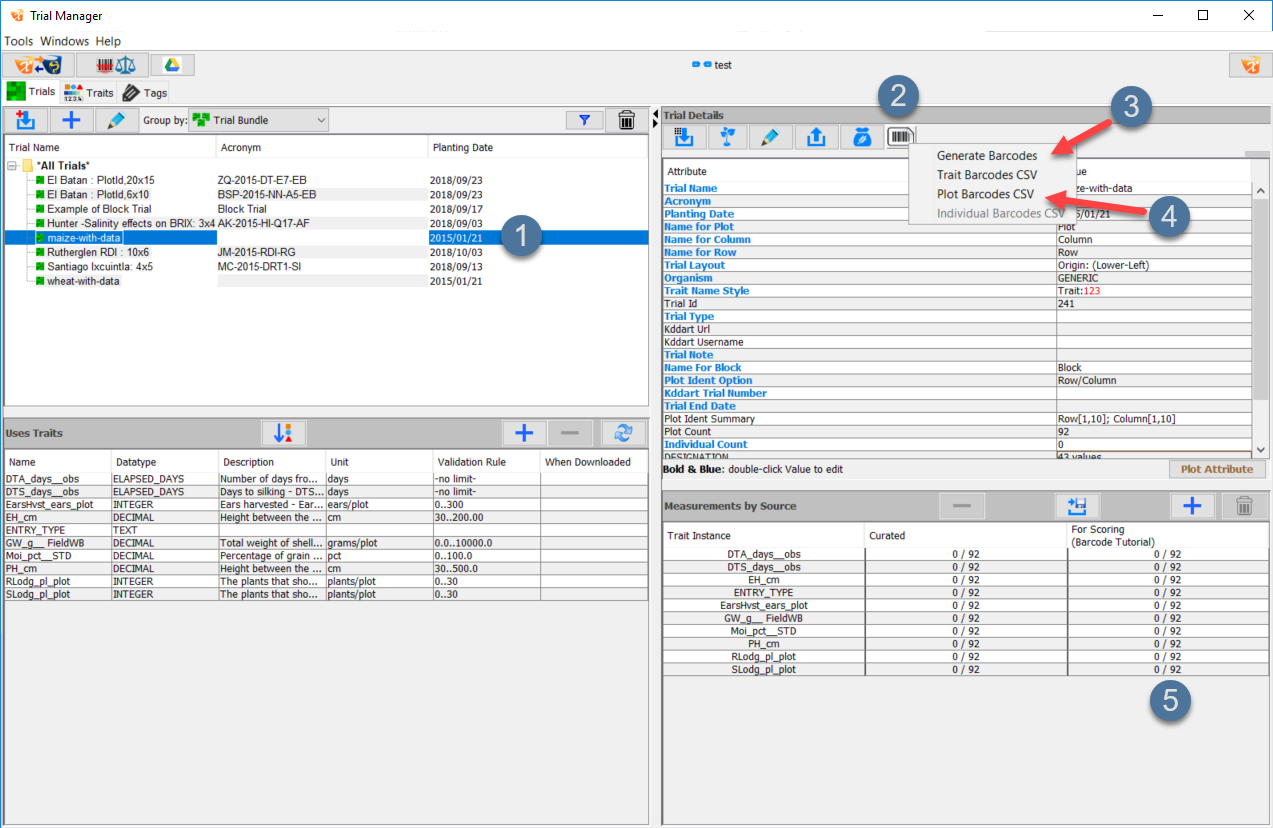
| 1. | Open KDXplore and select a trial (as at  ) so that its details appear in the Trial Details panel. ) so that its details appear in the Trial Details panel. |
| 2. | Select the  Barcode Button at Barcode Button at  to open the menu seen in the image. to open the menu seen in the image. |
| 3. | Select the Generate Barcodes option at  which will generate barcodes for all traits, barcodes, and individuals (if there are individual specimens available). which will generate barcodes for all traits, barcodes, and individuals (if there are individual specimens available). |
| 4. | Choose one of the CSV options such as Plot barcodes CSV. |
| 5. | The Barcode Window will open and provide a series of fields with check boxes that allow you to customise the information that is present under each barcode. For example, choosing the Trial Name, Row, and Column fields mean that when you print your PDF, each barcode will contain the trial name, row number, and column number under it (see below). Select the Save button to create the CSV file. |
| 6. | You will be prompted with an option to save a file called barcodes.csv. Save this in a location on your computer where you can find it again later. |
Now that the barcodes are saved in a CSV file, they are ready to be converted into a PDF. If you open the CSV file that you have created, there should be a column for the barcodes with a string of numbers in each entry. There should also be a column for any other field that you have chosen e.g. trial name. The next step in creating barcodes is to convert this CSV file into a PDF to be printed. See the following instructions on how to do this.
| Step | Action |
|---|---|
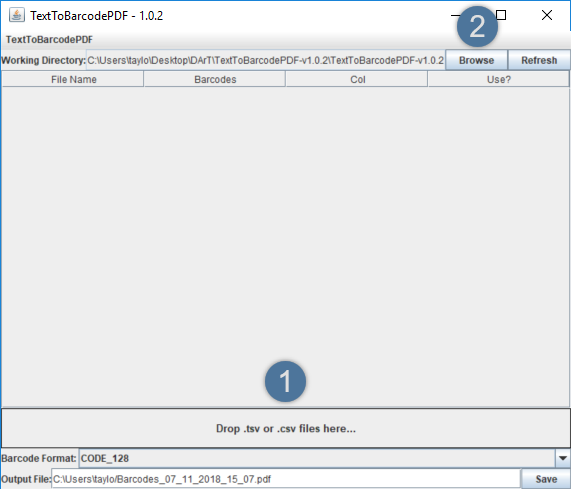
| 1. | Open the TextToBarcodePDF program. It should look like the above image. |
| 2. | Either drag+drop your CSV file into the program (into the area at in the above image) or use the Browse option (at in the above image) to open a file chooser and find your file. |
| 3. | Once the file has been chosen the program should look like the screen below: 
|
| 4. | Ensure that the checkbox in the Use Column is checked if you would like to use that particular file. |
| 5. | If the file location in the Output File: section then select the Save Button which will create and save the barcode PDF immediately. |
Step 2 - Export Trial to KDSmart
The trial that you have created the barcodes from also need to be exported to KDSmart to be scored. If you are not familiar with this process then it is recommended that you look at Tutorial 2 and Tutorial 3. The specific steps that you will need to take are:
- Create a Scoring Set of your trial in KDXplore.
- Transfer the Scoring Set to Google Drive.
- Import the Scoring Set to KDSmart.
Step 3 - Scanning Barcodes
Barcodes can be scanned in KDSmart when scoring a trial. The instructions below demonstrate how to navigate to the Barcode Scanner:
| Step | Action |
|---|---|
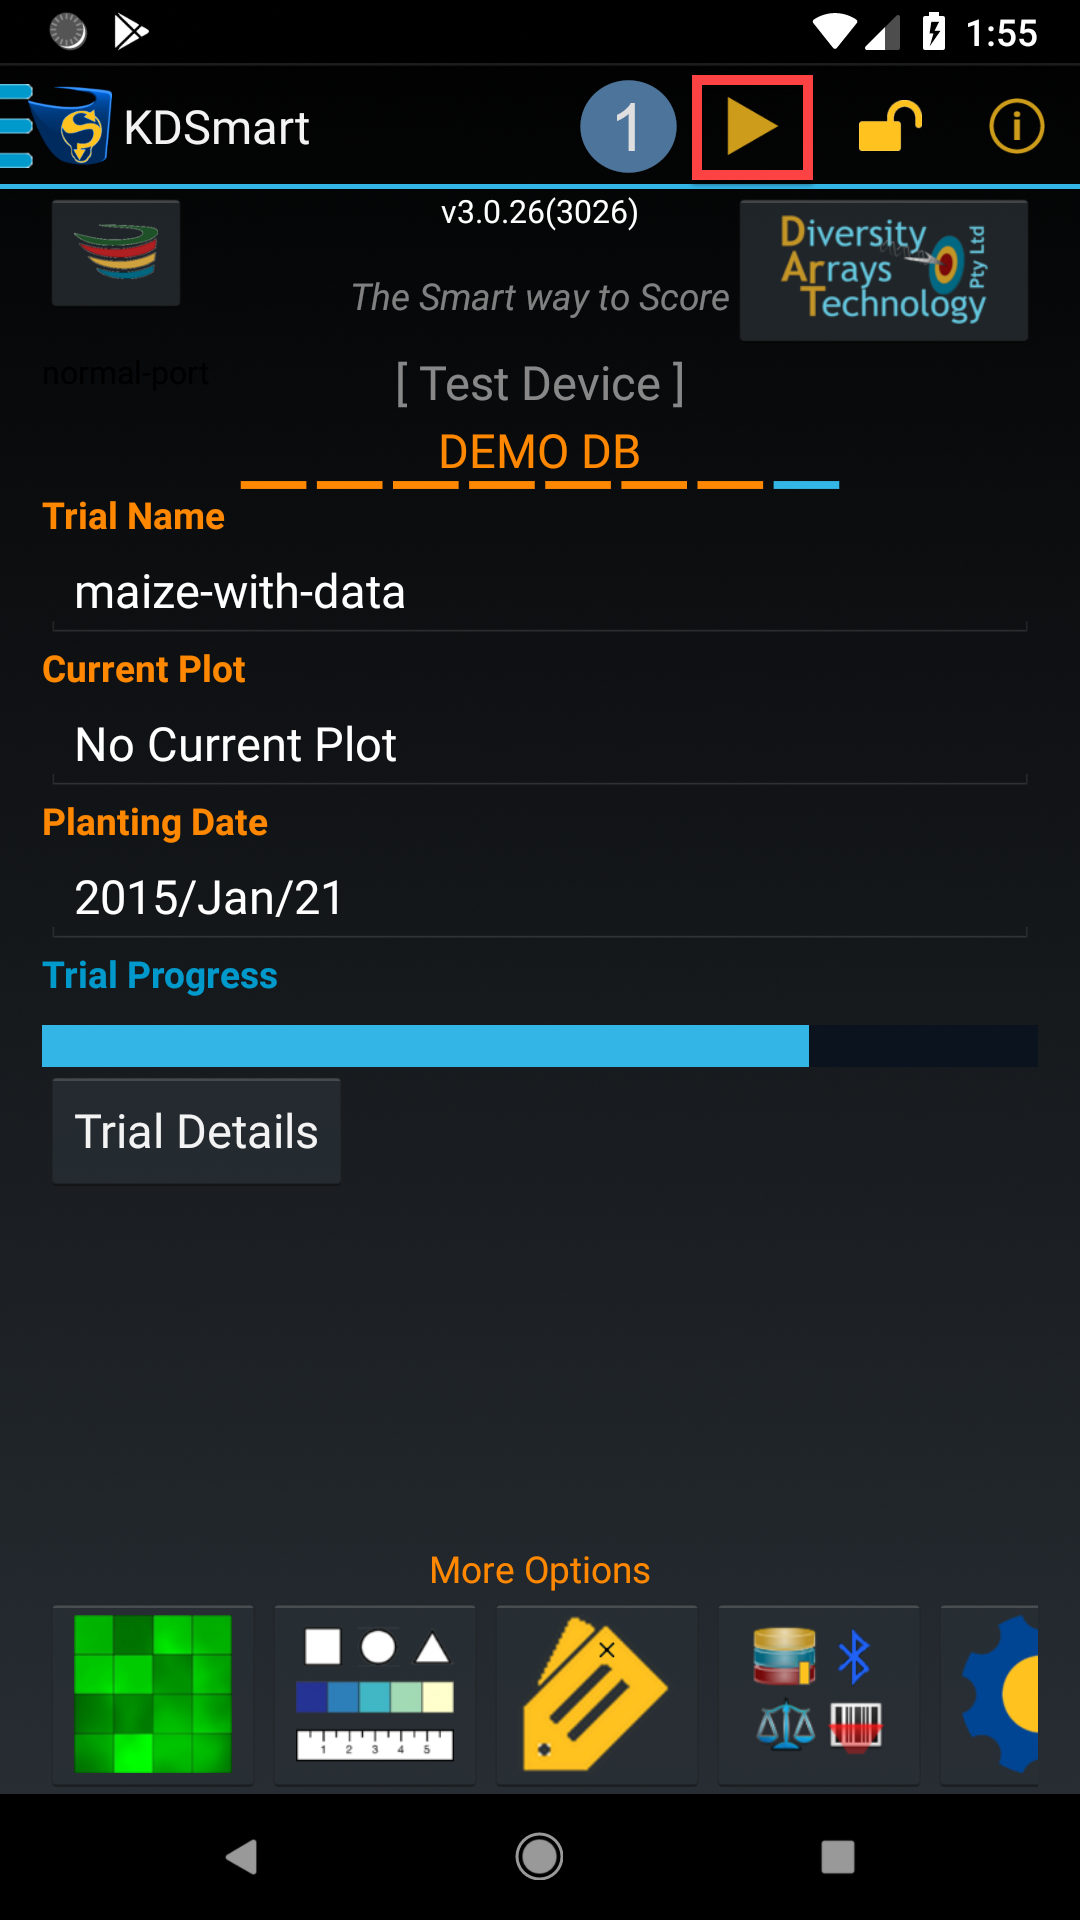
| 1. | Choose a trial and select the Start Scoring Button as outlined in the above image at . |
| 2. | Select the Menu Button at 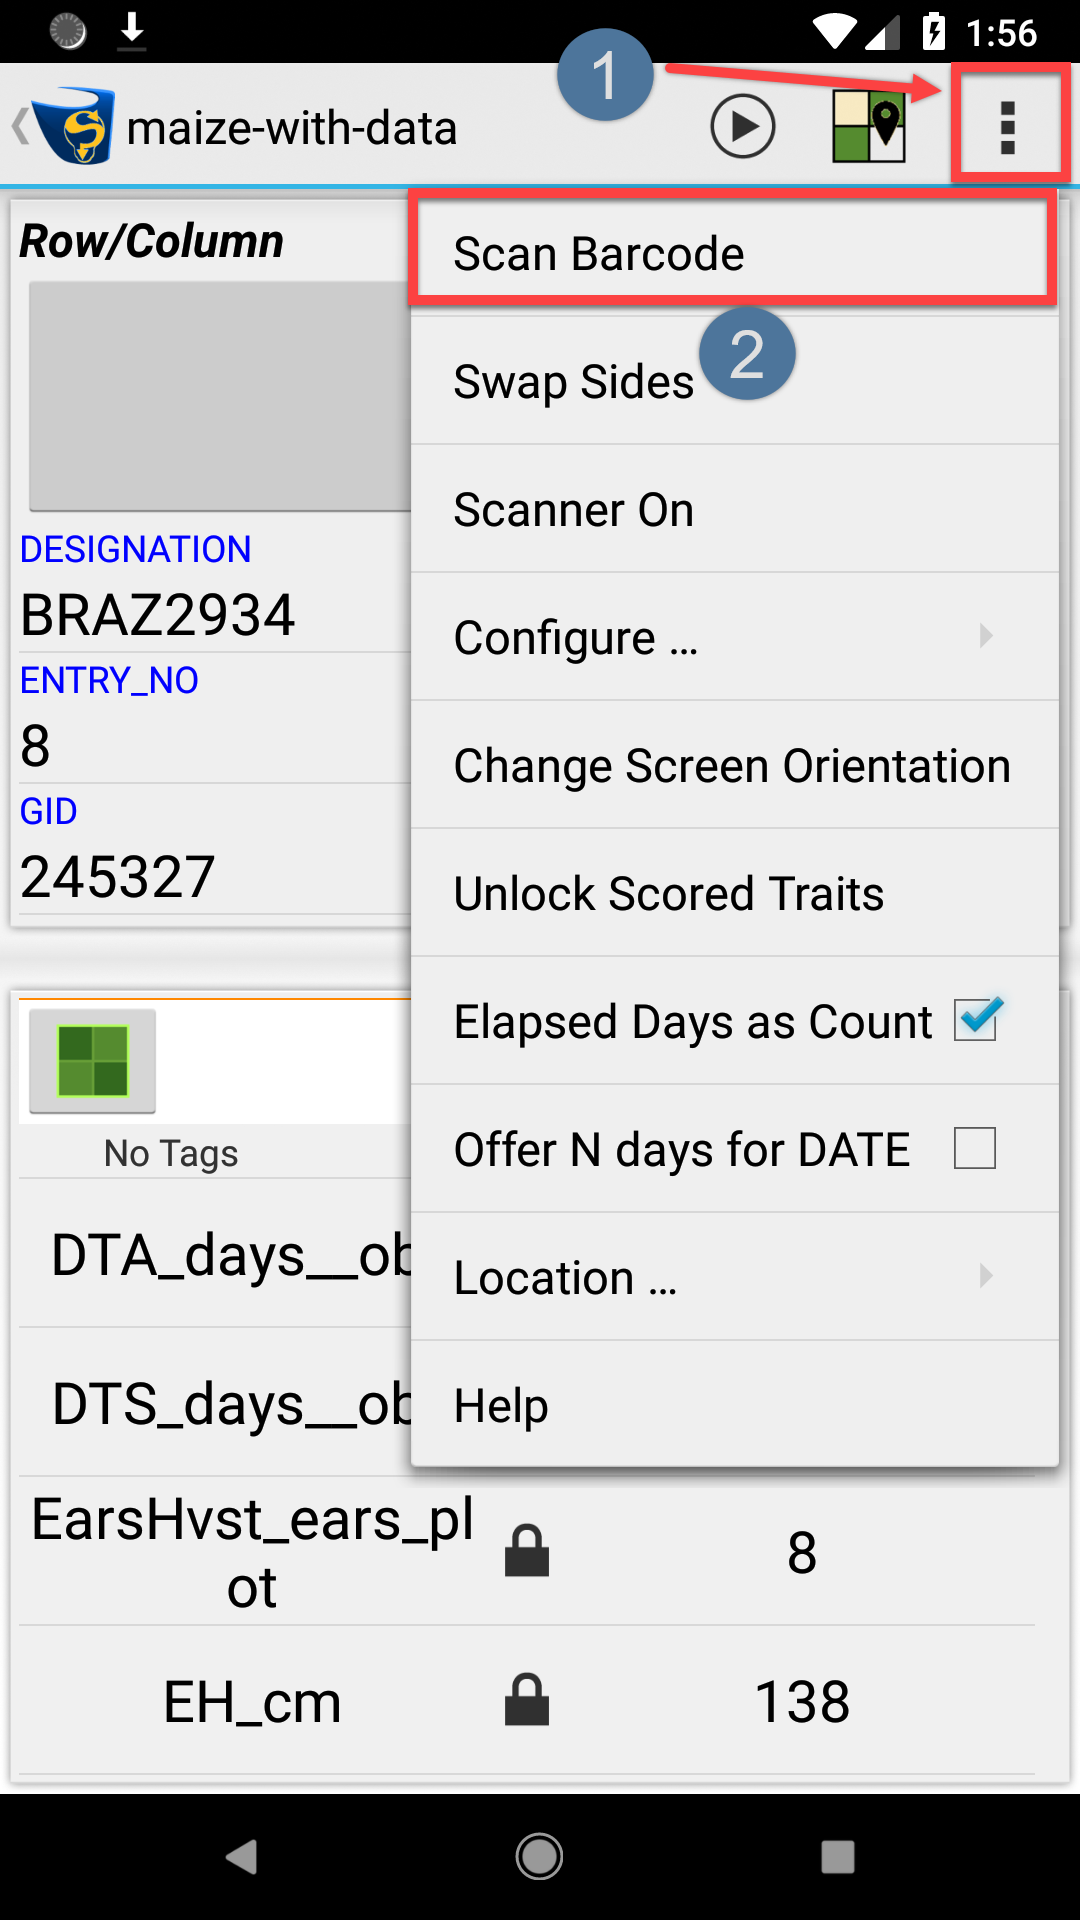
|
| 3. | You will need to accept the Android permissions for allowing KDSmart to take pictures and record video (if you have not already). |
| 4. | Once the phone camera turns on, hold it over a barcode to scan it. If it is a plot barcode then KDSmart will navigate to that plot for scoring. A trait barcode will ensure that KDSmart navigates to the scoring of that particular trait in your currently selected plot. |
sub-plot